Showing posts with label Dusty Attic Rusting Powder and Chipboard Set. Show all posts

Saturday, March 15, 2014

Notebook in a box

Hi, here comes my second box project with the March mixed media kit. This time I wanted to create a little present set with a tiny DIY notebook inside the box. And this is what I did:

I first cut a piece of corrugated cardboard to match the lid size.

Next I sprayed with the "Silhouette Silver" and the "Golden Doublooms" mists (Lindy´s Stamp Gang) over the paper and the let surface dry.
After that I dabbed some acrylic paint (Pebble) here and there for additional grungy effect.
And finally added some rusting powder here and let it do it´s magic.

After that I started decoration the box. The chipboard elements got a layer of mist and acrylic paint over them.
When that layer was dry I applied some black ink droplets here and there (Mantilla black).
After the chipboard pieces were all dry, I added some metal clockwork pieces and a little piece of dry embossed, with alcohol inks treated foil cardstock. 
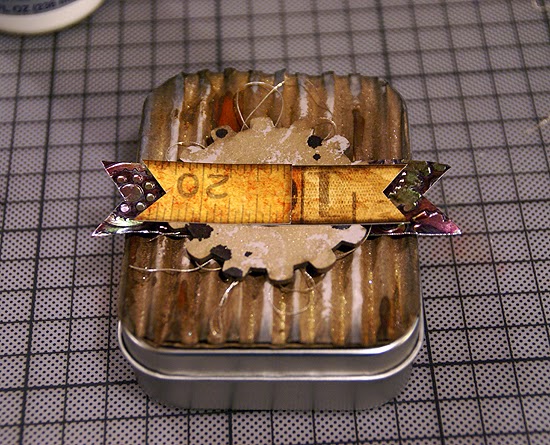
I layered various pieces over each other (also some stickers from the sticker sheet book that was in the kit). 
After finishing the lid decoration, I swapped over to the bottom part of the box and taped a washi tape around the box for additional interest. 

After finishing the box I wanted to create a little DIY notebook to go with it and made it the size to fit into the box. For the notebook I cut a piece of kraft carstock, rounded the edges and folded it in the middle. Then I took some notebook paper, cut it to match the book cover size and using a stapled the pages to the cover. 
Next I just decorated the notebook cover with corrugated cardboard, foil tape and some Golden Doublooms mist.
I also added some sticker elements and a small chipboard piece on top.
This is what the book loos like after it was finished.
And here is the complete finished set.
I hope you have enjoyed this little project idea!
xoxo, Sanna

Friday, March 7, 2014

Titanic Inspired Mixed Media Art Tin

Good morning everyone! Today I am sharing with you my first project for this month, a Titanic inspired mixed media art tin.

OK, so let me just start by saying that this kit has definitely been one of my favorites!! There was so much inspiration here--Tina really outdid herself! I started by covering the tin in alcohol inks. Then, I used the Dusty Attic rusting powder (which I'm going to tell you is AMAZING!!!) to go over certain areas of the tin to give it that really old, vintage look.


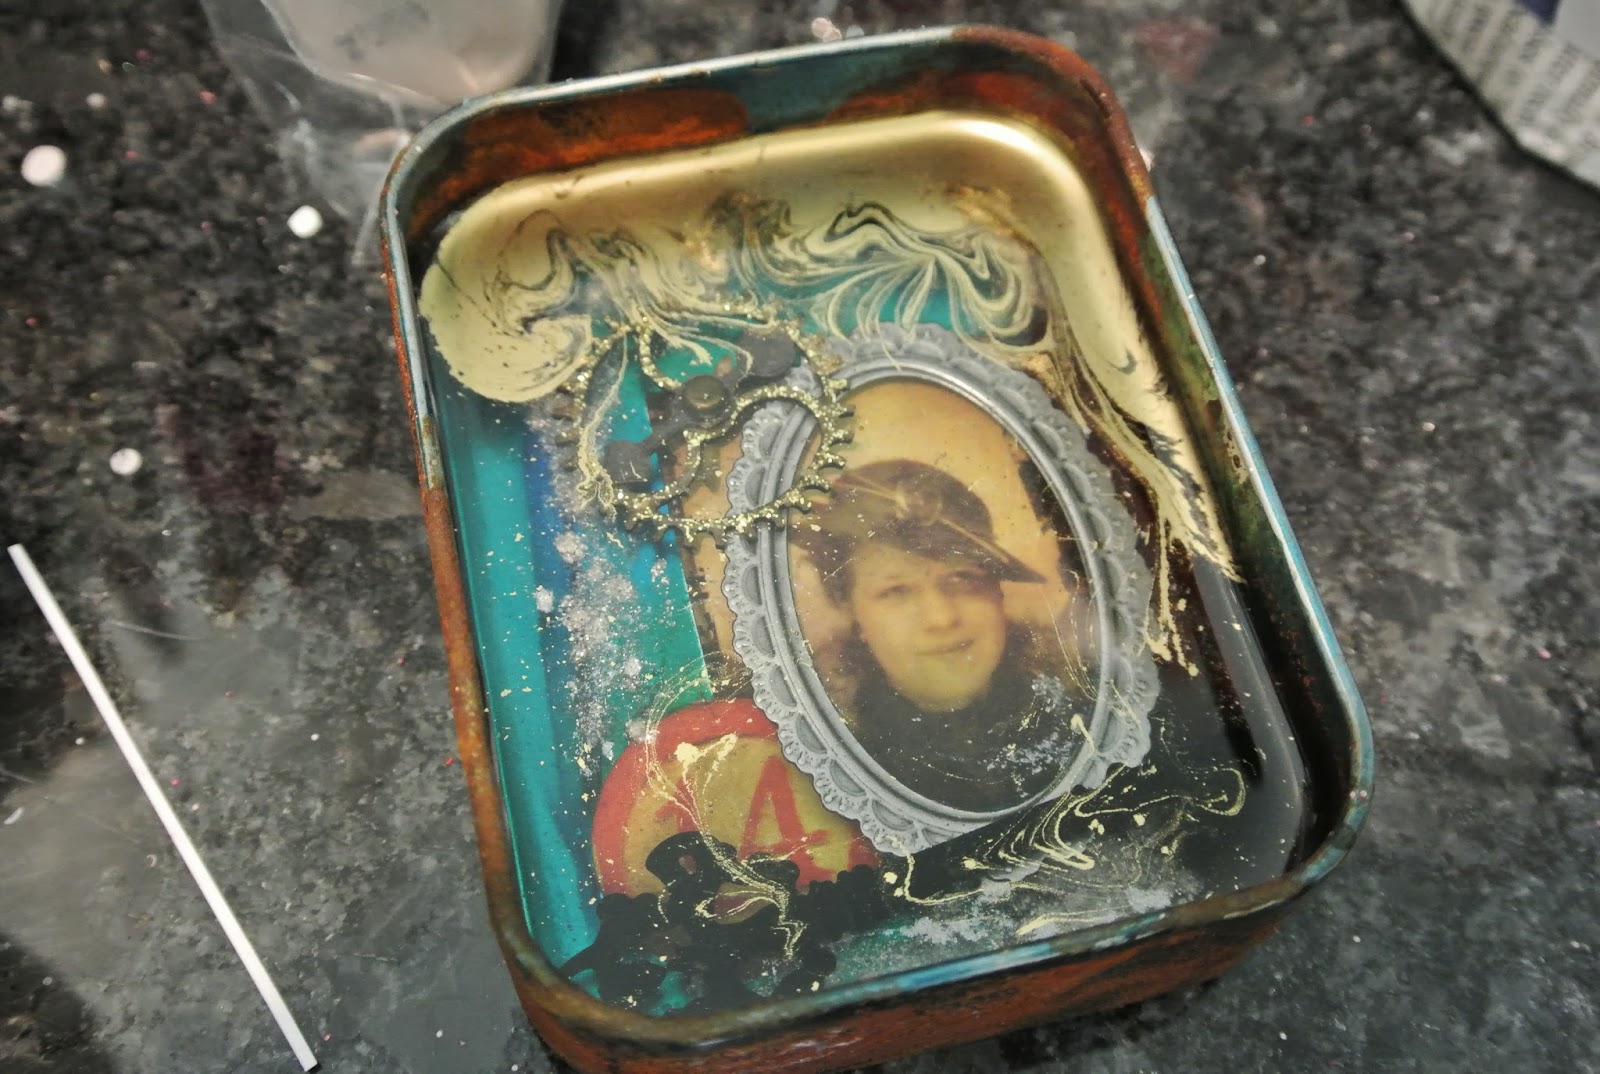
I added a couple of the vintage style sticker pieces from the Tim Holtz collection in the kit, then used equal parts of the Amazing Crafts clear resin and hardener to create the first layer of the piece. At this point I was thinking of the tin as a giant bezel. I also added some of the Alumilite Pearlescent Powder and swirled it around a bit with the tip of the mixing stick.


After allowing that layer to dry overnight, I continued on the next day. I covered one of the chipboard gears with gold Stickles and added that, as well as a key to the next layer. A "metal" frame from Tim Holtz was also added around the pic. I poured in another layer of the Amazing Crafting Products Clear resin and added some of the Alumilite metallic gold powder. I used another stick to create a swirl pattern, then allowed that to dry overnight.


This is how it looked when it was all dry:


For the final touch, I drilled holes in the top and bottom and added some teal wire and beads.


And here is the finished product. The layers created with the resin are really amazing. It was funny, because while I was creating this project I began to feel a story behind the piece. With the rusted metals and the vintage photo it seemed to have a Titanic sort of vibe. When I showed it to one of my teenage daugthers (when it was complete) the first thing she said was "it looks like something from the Titanic". My thoughts exactly!! :)

Thursday, March 6, 2014

Jewelry box

Hello there, Sanna here today! I am really proud to be able to be a part of the Frog Dog Studio team, and today I have the pleasure of sharing with you my very first kit projects. I will start with a jewelry box tutorial.

I started with the foil tape and first glued it on a piece of cardtock and then treated it with alcohol inks (Meadow, Currant and Mountain Rose). I let it dry before going over to the next step.

After the ink was all dry, I cut the excess paper off and placed the foil into a dry embossing folder and ran it thru my Big Shot maschine. 

After that I went and wiped the surface with black Archival ink for additional detail and let the piece dry. 
I wanted to have a similar look on the metal box, so I treated both the lid and the box with the same Alcohol ink colors.
After that I took out the rusting powder and some Glue n´ Seal, applied some white winegar in a spray bottle and started to treat corrugated cardboard and some metal and chipboard elements with it.  

First I applied the Glue n´ Seal with a paintbrush onto the metal pieces and before it was totally dry, poured some Rusting powder over the surfaces. 

 Next I dabbed off the residue powder and sprayed the surfaces with white winegar.
Now all I had to do was to leave it all to do its magic on its own - the instruction says it takes about 15 Minutes, until you start to see effects. I noticed that the parts with the thinner powder layer started rusting faster.  You don´t need to apply that much powder at all - a thin layer is enough.

I then repeated the same procedure with the chipboard elements and the corrugated cardboard.

I really liked the fact that the rust "bleeded" onto the paper underneath and actually used that paper on an other project later :). 
After the pieces were ready to be used, I started to decorate the box. I first cut the dry embossed foil tape piece to match the lid size, then glued a piece of corrugated cardboard over it and applied some Mantilla black over the surface for additional interest. 
Next I selected a clock sticker from the Tim Holtz Sticker book as a centerpiece for the lid, glued it onto a piece of cardstock to make it more stable, inked around the edges with black ink and added the big metal clip on the top. 

I then glued the clip onto the lid with tacky tape.
After that I just added some chipboard that I had treated with Lindy´s Stamp Gang mists, rusting powder and the paint dabber that was in the kit (Pebble) and glued them on their places. There is also a little sticker ticket and some silver yarn as additional decoration. And finally the sentiment metal labelon the top of it all.
Here are some detail photos: 


As you can see, I placed a thick foam piece into the box. It will hold the jewelry in place and keep it from getting scratched.

Wednesday, March 5, 2014

The Imperfection of Beauty


This kit is SO filled with creative product to play with.  I designed with some of kit for this post, and the rest for my Playful Musings later this month!


Taking a silver tin and turning it into a patina, rusted piece seems complex but really it isn't.  As always, I love layering, and this is a matter of layering and building up the look of aged metal!

One might want to start by using Gesso to base coat the tin.  I skipped that because I used a VersaMagic reinker and sponge to give the base of the patina color.

I next used the Golden Doubloons and sprayed liberally over the surface.  You will notice puddles of the mist, just let it be and it will dry by the liquid "dissipating into the air."  The different puddles gives wonderfully natural effects.

A bit of the Pebble paint dauber is used randomly to further the effect of old metal showing through the patina.  Following the instructions, (vinegar is needed) I rusted over other areas of the tin.  The rusting powder goes through the paint and adds such a yummy and textural effect!

Finally, as I was going through my Ranger stash, I came across an embossing powder that I haven't used in years.  It added an additional textural accent.  Older Frog Dog kits has amazing embossing powder that matches this technique as well as Ranger glitter to add a different look.  Having a membership to Frog Dog insures you get the kits each month so you don't miss out!  (Ok, a commercial but the kits sell out fast so if you like the products this makes sure you can have them and enjoy!).

The Lindy's sprays and rusting powder was used on the little word band to give the look.  A metallic paint was also used for enhancement.


The chipboard was done much the same way as the word band.  I sprayed, painted, sprayed, used the rusting powder on the one gear only.  Used the metal brad plus another brad of my own.


Having a great time with Amazing Crafting Products!  On the inside of the tin, I continued to age and create a rusty look by using a Buddha statue and Amazing Mold Putty to make a mold for this wonderful face.  Loving the Lindy's Mists.  I used one from another kit and the current kit.  The background is accented mulberry paper with stains.  Amazing Crafting Products are by the Alumilite Corporation.  More ideas are on their blog, http://amazingmoldputty.blogspot.com  


The inside is my personal statement to match the word band of "embrace imperfection."  I find that the most beautiful things in the world (people included) are not perfect.  There is a level of character and wonder in things not exact!  I follow how I create my art in such a manner.  I like the unexpected!!!

I don't expect us to withdraw totally from civilization, but when I design my art, I do withdraw into my own world.

My Playful Musings will focus on Memorabilia and aging wood!

Cre8tivelea Yours - Lea

Namaste'