Showing posts with label Layouts. Show all posts

Monday, September 16, 2013

A Blank Canvas, September Edition...

Hi Tina here today with the September Edition of 'A Blank Canvas', my monthly blog series that walks through how I create a mixed media layout from a naked sheet of cardstock.

By adding Kit supplies and product from my own stash, I will take the ordinary and turn it into something unique and special.  I hope you join me each month as I travel this journey of creation and exploration!

Before we get to the step-by-step, let's take a peek at my mixed media layout created for September.


Products used from the September kit include:  Faber Castel Big Brush Pens, Fragments, Hero Art Ink, Paper Pen, and watercolor paper. I also used a star stamp from the Stamp Add On, available in the Frog Dog Studio shop.

In addition, I Studio Calico wooden bubbles, Zing embossing powder, UTEE embossing powder, and a Fude Ball pen from my stash.

Before I share the video tutorial, here are a few more close-ups of my layout.


And the video...


I hope you enjoyed by design process tutorial! I am loving neon right now, so I created a second mixed media layout and I thought I'd share it too.


I hope you enjoyed this month's edition of 'A Blank Canvas'!  Please try out these techniques and share your projects with us on our Facebook page!  We love to see what our members and friends have created!


Thursday, August 22, 2013

August Guest Designer - Emilia van den Heuvel!

Hello and Happy Thursday!  We are very excited today as we announce another fabulous Guest Designer for August, Emilia van den Heuvel!

Thank you Emmy for sharing your amazing talent and creativity with us!  Before we get to her first project (which you will love), let's get to know her a little better!


Short Bio:
My name is Emilia van den Heuvel. I’m a Bulgarian girl, living and working out of the Netherlands. I grew up in the beautiful capital of Bulgaria – Sofia and being a city girl is kind of in my blood. My mom filled our house with books and painting and art journals and she thought me to love all things crafty and artsy.
Before I moved to the Netherlands to be with my husband, I was working as a vet and now I’m a part-time translator, a full-time mommy to my amazing munchkins – Theo and Elise and a passionate crafter. In my spare time you will find me behind my crafty table, reading a book or visiting the next magical place with my family.
I started scrapbooking in 2004 after my first child was born. I think it is the perfect way of preserving our memories. Every single one of my pages is telling a story, which will always remind my children who they are and who we were as a family.
I'm so honored to be Guest designer for Frog Dog Studio kit in August and I want to thank Tina for giving me this amazing opportunity! 

Let's get to Emmy's first project!

Hello Frog Dog Studio friends!

This month I have the honor to be a Guest Designer for Tina’s AMAZING Mixed Media kit. The moment I saw the amazing product combination, that Tina put together, I knew exactly what I will do with every single item in the kit.

Today I would like to share my first project with you – ENJOY YOUR LIFE –


And here is how I did it:

I started with a white cardstock, metallic paint and a brush.


Using a metallic paint made my background pearly and shimmering, which was exactly what I needed, because I wanted to match the fantastic Glitter Paste from the kit.


After the blue paint was dry I began altering my background by adding extra dimension to it – with the glitter paste and The Crafter’s Workshop template included in the kit:


… and with the VIVA Inka Gold paste and the same mask:


Both products are easy to work with and the effect is amazing! You can use them as modeling paste to create dimension or as a covering medium to draw and color.

After the glitter and the Inka Gold were dry I added Silver Paint Dabber as a frame around my background. But because the color was too dark for my taste, I rubbed extra Viva Inka Gold Platinum on top.


Then I started working on my embellishments. I used the two book pages and a flower stencil to create my flowers.


I crumbled the petals and added a pearly brad in the middle to finish them off.


For the frame under my picture I used 4 ATCs {incl. in the kit}. I attached them together and rubbed their edges with VIVA Inka Gold.


When the paint was dry, I adhered my picture on top of the ATC frame and rubbed some more Inka Gold color to mask the edges.

For the small blue flowers I used the flower ribbon included in the kit.


I fussy cut some of the ephemera pictures and added them to my layout.


The wooden embellishments included in the kit are also fantastic! They can be used on any projects and because they are already painted and altered you can attach them just as they are.


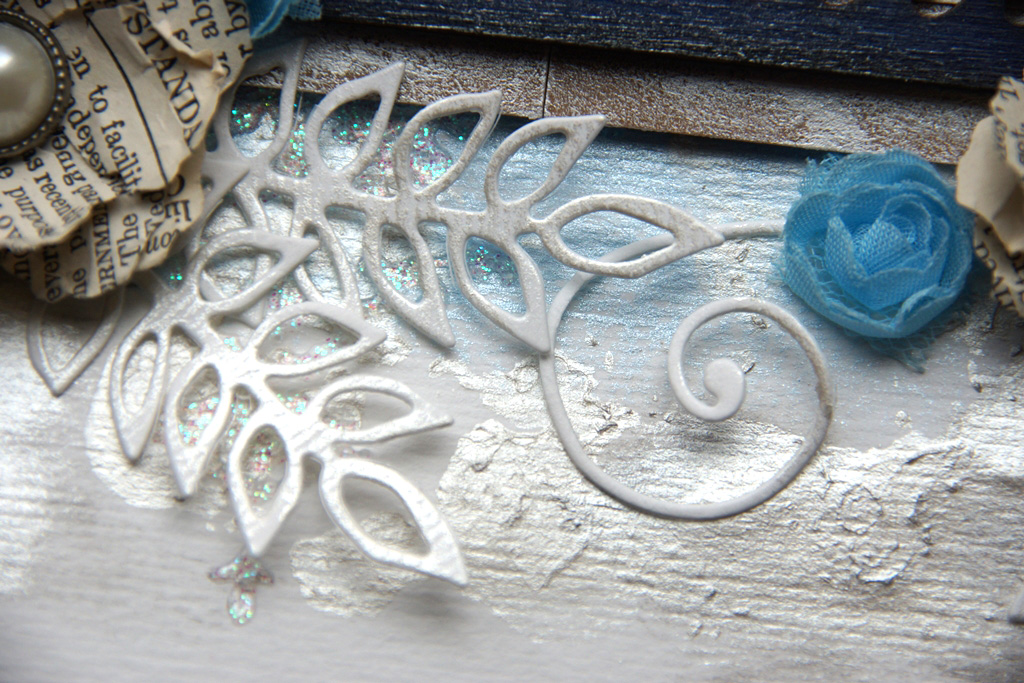
To decorate my flowers I die cut different sizes swirls and leaves from white cardstock. I rub them with Viva Inka Gold to give them a light silver shimmering layer.


For my title I used one of my favorite quotes. I printed the words on white cardstock, cut the lines out and distressed the edges with blue ink. Because the color was a bit darker than I expected I added a layer of Inka Gold on top.


As you can see the possibilities with the August Kit are endless. And I didn’t use even the half of the included materials!

I hope I managed to inspire you a little with today’s post!

Have a wonderful messy day!

Hugs ‘n smiles,
Emmy

What a stunning and beautiful layout Emmy!  Thank you! Be sure and stop back later in the month for another project from Emmy.  We can't wait!  Please stop by Emmy's Blog and say hi! 

Thanks for stopping by!


Friday, August 2, 2013

Special, Special! Read All About It! Paper Add On kit for August!

Hello and Happy Friday!

Tina here today with a short, quick post!

We LOVED the August so much, we really wanted to expand your creative options and crafting desires....so for the month of August, we included a Paper Add On Kit!

 
If you are a hardcore scrapper, this kit is perfect for those summer time layouts.  If you are a Mixed Media scrapper, this collection is great for creating those off the page canvases and mixed media projects.  If you are a mixed media artist, this collection is a great way to expand your mixed media options with the Maya Mist, Inka Gold and Stickles.  Just think of the amazing projects you can create by adding the 2 kits together.

Keri and myself created several layouts using the Paper Add On kit to get your mojo started!  Let's check 'em out!


Aren't the colors, embellishments, and mixed media product simply yummy?

The Paper Add On kits are limited in quantity so if you want one, you better act quick!

That's all for today!  I hope you have a wonderful weekend!  Thanks for stopping by!


Monday, July 1, 2013

All it takes is a little Distress Paint and water!

Hi and Happy Monday!

Tina here today to start our new month of project tutorials and how-to's.  The kit this month is very special.  The July kit has an awesome Ephemera sheet from Art Chix and 2 bottles of my favorite 'new' product, Distress Paints. I could create for hours with just these 2 items.  :)


This is probably one of my current favorite layouts of all time. I'm not sure if it's the colors, the photo, or the simplicity of the layout, but this one is will always be in my top 5.

I put together a video tutorial on how I created this awesome looking background, using just 2 colors of Distress Paint and water!  SUPER easy, and really FUN!


How about some close-ups of that amazing detail?


Be sure and stop back every week in July.  The Design Team has some A.M.A.Z.I.N.G kit projects to share!  They are incredible.

Also, if you love Distress Paints as much as I do, Frog Dog Studio carries additional colors in their store.  You can add these to your kit with no additional charges for shipping!  How cool is that?

I was so inspired by this easy technique, I created a second layout.  I don't have a tutorial on how I created it, but I thought I'd share it with y'all!  Let me know if you have any questions about the techniques used.


Thanks for stopping by!  Have a great Monday!


Friday, June 28, 2013

From nothing to something...

Hello and Happy Friday!

Tina here today with a mixed media layout using items from the June kit. 

One of my favorite ways to create a scrapbook layout is by starting from nothing and ending with a mixed media project that is unique and one of a kind.  There is something exciting about adding paint, ink, ephemera, and little bits and pieces to a sheet of chipboard to create a fun, unique, and interesting background.  I will walk you through how I created this layout.


To start, find a scrap piece of chipboard, or use a standard 12x12 sheet of chipboard. 

You will also need the sewing pattern tissue paper and envelope from the kit.


Crinkle several pieces of the tissue paper and apply to chipboard with matte medium (or Mod Podge)


Dry completely.

Next, apply either spray Gesso or liquid Gesso to chipboard and dry completely.


Look at that fabulous texture the crinkled tissue paper creates.  This will look great when you apply paint and ink to the background.


Then liberally apply Twinking h20 watercolor paint (from the kit) to the background, allowing the paint to seep in and around the creases and folds.  You can also splatter drops of watercolor paint to the background and let the paint drip down the chipboard.


Once the watercolor paint is dry, using the Frog Dog Studio exclusive stencil, spray mist onto the background.


To finish the background, I added rips sections from the sewing pattern paper to the right side of the page by simply adhering the paper to the chipboard with my fingers and Gesso.  I wanted some of the words and design from the envelope paper to peek through, so I wiped off the Gesso to reveal the paper below. 

I then dripped several drops of blue alcohol ink to my craft mat and dipped my finger into the ink.  I smeared the alcohol ink onto the background and mixed some of it with Gesso to soften the color.

I also applied more watercolor paint and let it drip down the background.


To complete my layout, I applied Gesso to the wooden title and once dry, applied red alcohol ink. 


Lastly, I wanted to use some of the twine from the kit, but wanted a deeper blue, so I 're-colored' the twine with blue alcohol ink.  I stapled the twine to the background and added my photo and the layout was done!


Here are some close-ups of my layout.


Next time you want to create a layout entirely from scratch, pull out your Frog Dog Studio kit and create something fun, unique and one of a kind.  Be You!

Thank you for stopping by!  Enjoy your weekend and Happy Crafting!