Showing posts with label Embossing. Show all posts

Tuesday, March 25, 2014

March Mixed Media Kit: Mini Book | In A New York Minute

Hello All! Wendy here to share up my third project this month for Frog Dog Studio!  
One last crush with the March Mixed Media Kit!


Check out my previous project, “In A New York Minute”, and video tutorial here using the 5x2x3.5in tin from the March Mixed Media Kit.  

Also, I made a second project with the  smaller 2.5×3.5x1in tin found here.

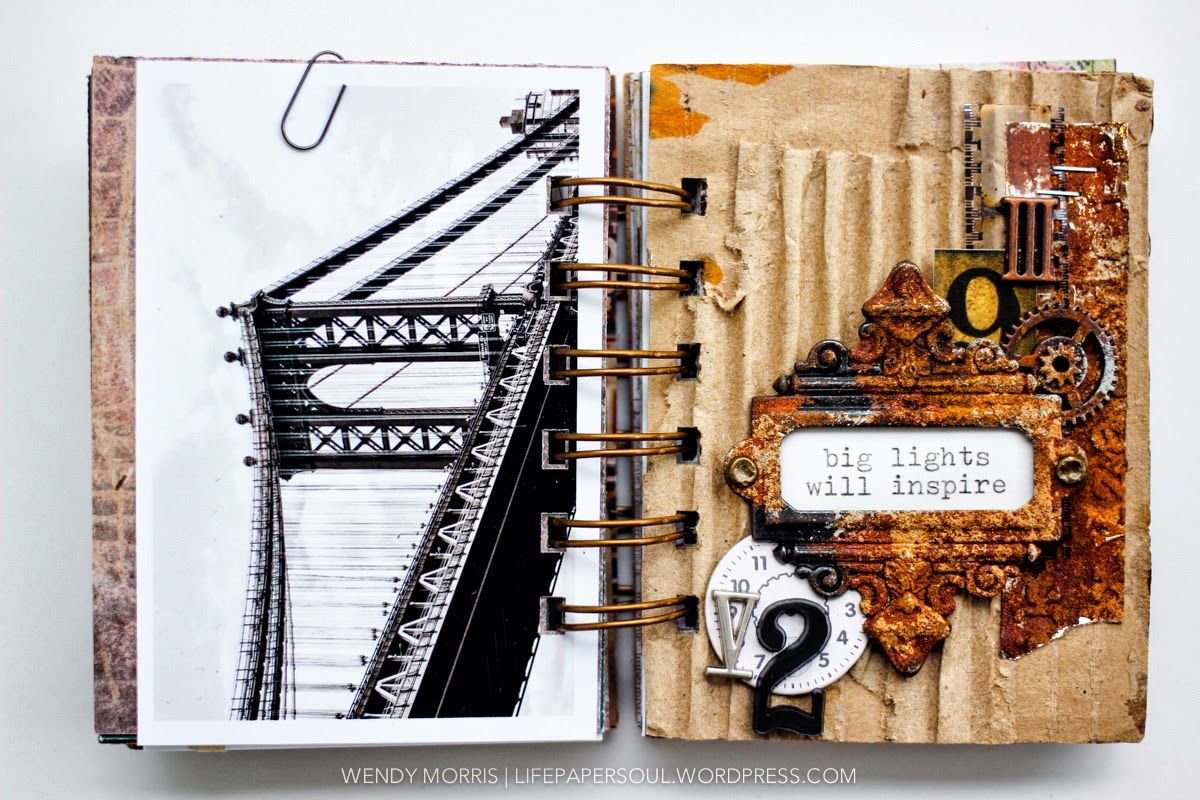
As promised earlier this month, I planned to created a mini book to fit inside my altered tin. My fiancé & I took a trip last Spring '13 to NYC, his first time and my 4th time, and each visit is beyond the experience.  I wanted to make a mini that captured my fav photos highlighted from our trip together.  


While in NYC, we made a pit stop at The Ink Pad, the mecca of rubber stamps and just pure stamper's paradise!  So, I added in this Time Squares stamp on the cover of my mini.  It just spoke to me as perfect to kick start my mini.  I could have been spent HOURS in that store and the fiancé was SO patient and supportive to find the store with me in the pouring rain. Ha!

So, let's dive into my mini...


I wanted to enhance my mini with lots of clocks representing the fast pace of the city, the hustle and bustle of movement of people.  I used the corrugated paper that comes in the March Mixed Media Kit for a couple of pages in my mini.  This paper is perfect to rip up and give the worn and tattered look.  There are several clock stickers for perfect use from the Tim Holtz sticker book in the kit.  Then, I also added The Dusty Attic rusting powder (included in the March Mixed Media Kit and here) and Ranger Paint Dabber in Pebble to accent my metal and wood embellishments.  

You can check out my video here for more on the rusting powder technique.    


More of the rusting technique is used on these pages for the embossed and metal accents.  Also, I was inspired by the Alicia Keys song, "Empire State of Mind" (I might have been humming it a time or two in creating this project, ha!).  One does feel such inspirations and dreams in this city of bright lights.  

On a side note, I intentionally kept the majority of my photos as black & white for uniformity in the photography with a splash of color on a photo here and there and for better flow of the embellishments.  


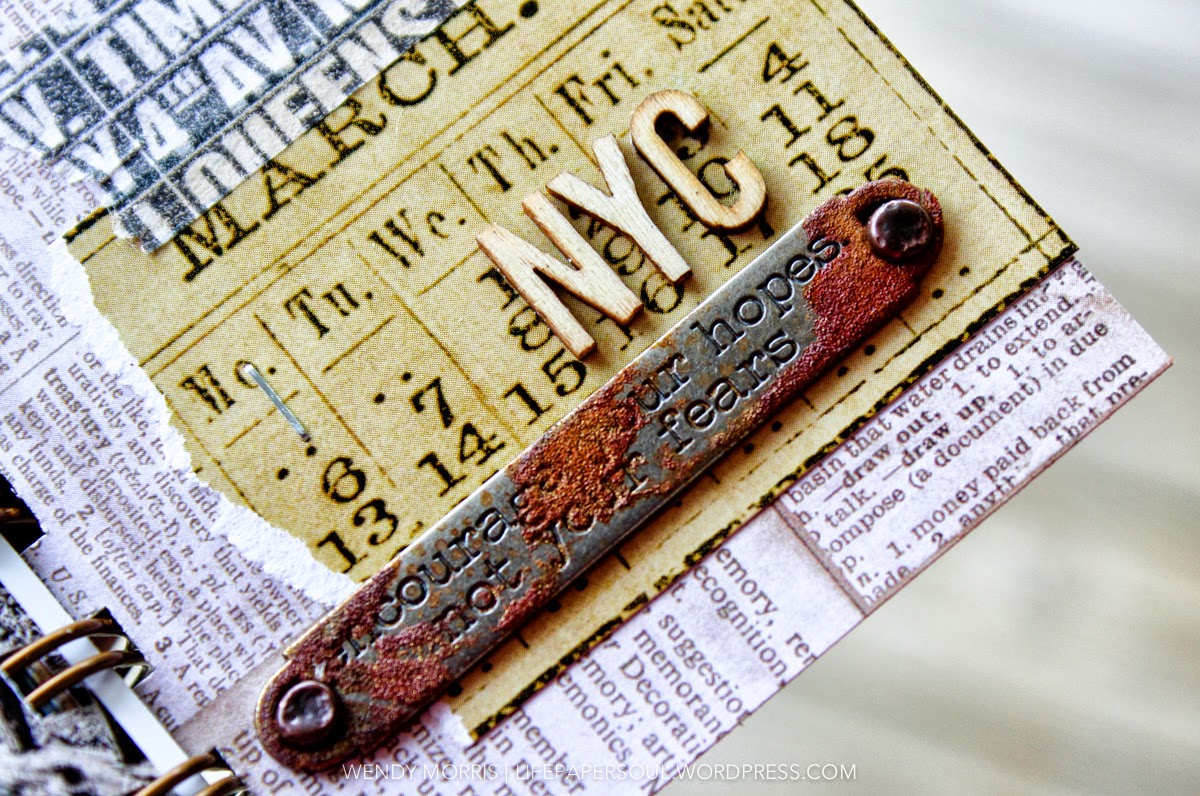
The iPhone photo of us two is a bit fuzzy but sometimes fuzzy photos capture the sweetest moment.  We were hitting the town to see "Phantom of the Opera".  The fiancé was quite a bit jet lagged from Europe but was a trooper for the long opera night and dressing up.  I used the ticket stickers from the Tim Holtz sticker book in the kit to represent the cinema/theater night together.  

Here are a few more pages...


Check out the full supply list later today on my blog here.

Hope you enjoyed my project today! 

On a side note, April Mixed Media Kit is already in my hands and I'll see you next month to kick off projects with this kit!  

ANOTHER amazing kit to come...

xo | Wendy

Sunday, March 16, 2014

March Mixed Media Kit : Altered Tin | A Wish

Hello All!  Wendy here to share up my another project for you using the March Mixed Media Kit!  


The awesome thing about this kit is that you receive TWO alterable metal tins.  
Check out my previous project, "In A New York Minute", and video tutorial here using the 5x2x3.5in tin from the March Mixed Media Kit.  I'm still working on my coordinating mini book that will go inside the tin, and that will be revealed up on 3/25.

In this project, I used the smaller 2.5x3.5x1in tin.  
Such a sweet small tin and again along my theme of “Make Mine Mini”, where you’ll see a ‘mini’ project or two....from me during the month. 

This tin would would also be perfect for including ATC cards too!

I really love the vintage photos in the Tim Holtz Salvage - Crowded Attic sticker pack included in the stick.  You get a LOT of stickers in that booklet!!  So, I chose a couple of vintage photo stickers to incorporate on the cover of my tin.  

I used an alpha print dry embossing template in my stash to make the background on the foil tape sheet attached to the tin.  Check out my video tutorial on how to make the rusted tin effect using the Tim Holtz foil tape sheets and rusting powder included in the March Mixed Media Kit.  The rusting powder (sold out for now, but MORE is being ordered) is pure MAGIC!! I can't get enough of it!!

Plus, the amazing product from Lindy's Stamp Gang, Ranger Adirondack Paint Dabber in Pebble, and Jacquard Piñata Alcohol Ink in Mantilla Black are also included in the March Mixed Media Kit.


I used some clear acrylic fragments in my stash to mount on top of the photo stickers.  Then, some rubons were used to adhere on top of the clear fragments.  


For the inside of my tin, I chose more stickers (i.e. ticket stubs, calendars) cut to size and fit inside the tin lid and tin bottom.  More of the rusting powder technique was used in altering these stickers.


I hope you enjoy my project!  

Full supply list will be posted up later today on my blog.

Check back here on the blog on 3/25 when I share up my last project using the March Mixed Media Kit.  

xo | Wendy

Wednesday, March 12, 2014

March Mixed Media Kit: Altered Tin | In A New York Minute

Hello All!  Wendy here to share up my first blog post as design team member for Frog Dog Studio!  I absolutely fell in LOVE with the March Mixed Media Kit because everything coordinated so well together in such beautiful harmony.  My first project created for this month uses the 5x2x3.5in tin from the March Mixed Media Kit.  

I created the project titled, "In A New York Minute".


So, to add a bit of interest to my blog post, I made a quick video to give you a ‘behind-the-scenes’ into my process.  

My favorite items included in this kit is The Dusty Attic Rusting Powder.  All I can say is, “I NEED more!” Ha! This powder is pure magic!!


Check it all out here in my video…


Check out the full supply list for the project on my blog here.

Also, I’ve committed to one project in my monthly series, “Make Mine Mini”, where you’ll see a ‘mini’ project (i.e. mini album, mini canvas, etc) of some sort from me during the month.  I’m excited about this ‘mini’ series and look forward to inspiring you with the Frog Dog Studio kits! 

xo | Wendy

Thursday, March 6, 2014

Jewelry box

Hello there, Sanna here today! I am really proud to be able to be a part of the Frog Dog Studio team, and today I have the pleasure of sharing with you my very first kit projects. I will start with a jewelry box tutorial.

I started with the foil tape and first glued it on a piece of cardtock and then treated it with alcohol inks (Meadow, Currant and Mountain Rose). I let it dry before going over to the next step.

After the ink was all dry, I cut the excess paper off and placed the foil into a dry embossing folder and ran it thru my Big Shot maschine. 

After that I went and wiped the surface with black Archival ink for additional detail and let the piece dry. 
I wanted to have a similar look on the metal box, so I treated both the lid and the box with the same Alcohol ink colors.
After that I took out the rusting powder and some Glue n´ Seal, applied some white winegar in a spray bottle and started to treat corrugated cardboard and some metal and chipboard elements with it.  

First I applied the Glue n´ Seal with a paintbrush onto the metal pieces and before it was totally dry, poured some Rusting powder over the surfaces. 

 Next I dabbed off the residue powder and sprayed the surfaces with white winegar.
Now all I had to do was to leave it all to do its magic on its own - the instruction says it takes about 15 Minutes, until you start to see effects. I noticed that the parts with the thinner powder layer started rusting faster.  You don´t need to apply that much powder at all - a thin layer is enough.

I then repeated the same procedure with the chipboard elements and the corrugated cardboard.

I really liked the fact that the rust "bleeded" onto the paper underneath and actually used that paper on an other project later :). 
After the pieces were ready to be used, I started to decorate the box. I first cut the dry embossed foil tape piece to match the lid size, then glued a piece of corrugated cardboard over it and applied some Mantilla black over the surface for additional interest. 
Next I selected a clock sticker from the Tim Holtz Sticker book as a centerpiece for the lid, glued it onto a piece of cardstock to make it more stable, inked around the edges with black ink and added the big metal clip on the top. 

I then glued the clip onto the lid with tacky tape.
After that I just added some chipboard that I had treated with Lindy´s Stamp Gang mists, rusting powder and the paint dabber that was in the kit (Pebble) and glued them on their places. There is also a little sticker ticket and some silver yarn as additional decoration. And finally the sentiment metal labelon the top of it all.
Here are some detail photos: 


As you can see, I placed a thick foam piece into the box. It will hold the jewelry in place and keep it from getting scratched.

Monday, October 7, 2013

Spooky Texture with the October Kit

This month's main project was such a joy to create...lots of spooky texture & color!

When I first received my kit, I began laying products out in a general idea of what I wanted to create:


The little details of this kit are so unique & fun, I couldn't wait to start altering the house:


I began with the stencil + embossing paste, then sprinkled the embossing powder on top:


After heat-embossing, I sprayed the house with Screamin' Banshee mist:


Then I sprayed Freaky Franken Lime over the top, letting the mist pool on top of the embossed sections:


I love the dark teal that was created by the combo of Screamin' Banshee + Freaky Franken Lime. To keep the spooky green as a highlight, I left the lime droplets to dry overnight, without blotting.


 I created a midnight-sky background with black paint and the embossing powder.  Then I distressed the moon with some ink, white spray mist, and my trusty Crackle Accents.


I love how the project came together.  I can't wait to frame it and hang it up for Halloween!