Showing posts with label Exclusive Stencil. Show all posts

Tuesday, October 22, 2013

Cozy Up With This Day of the Dead Pillow!--Using the October Limited Edition Kit

Good day, friends! I wanted to share with you another idea on how to use some of the materials from the October Limited Edition kit. I have to tell ya'll that I have had a blast creating with this kit :) Now I'm not much of a seamstress, or sewing person, or whatever you would call that, but every once in a while I get the strong urge to sew something. So I thought it would be fun to create a pillow using the super cool Day of the Dead stencil from the kit.

The first thing I did was cut down a piece of muslin, and using my beloved Gelli plate (from last month's kit) I went to work monoprinting a background design. I don't like "scary" Halloween type of stuff so I thought it would be neat to make this sort of girly and colorful. I used bright colors like Quinacrodone Magenta and other shades of pink, as well as a variety of stencils and Catalyst tools. When I was finished printing the muslin looked like this.

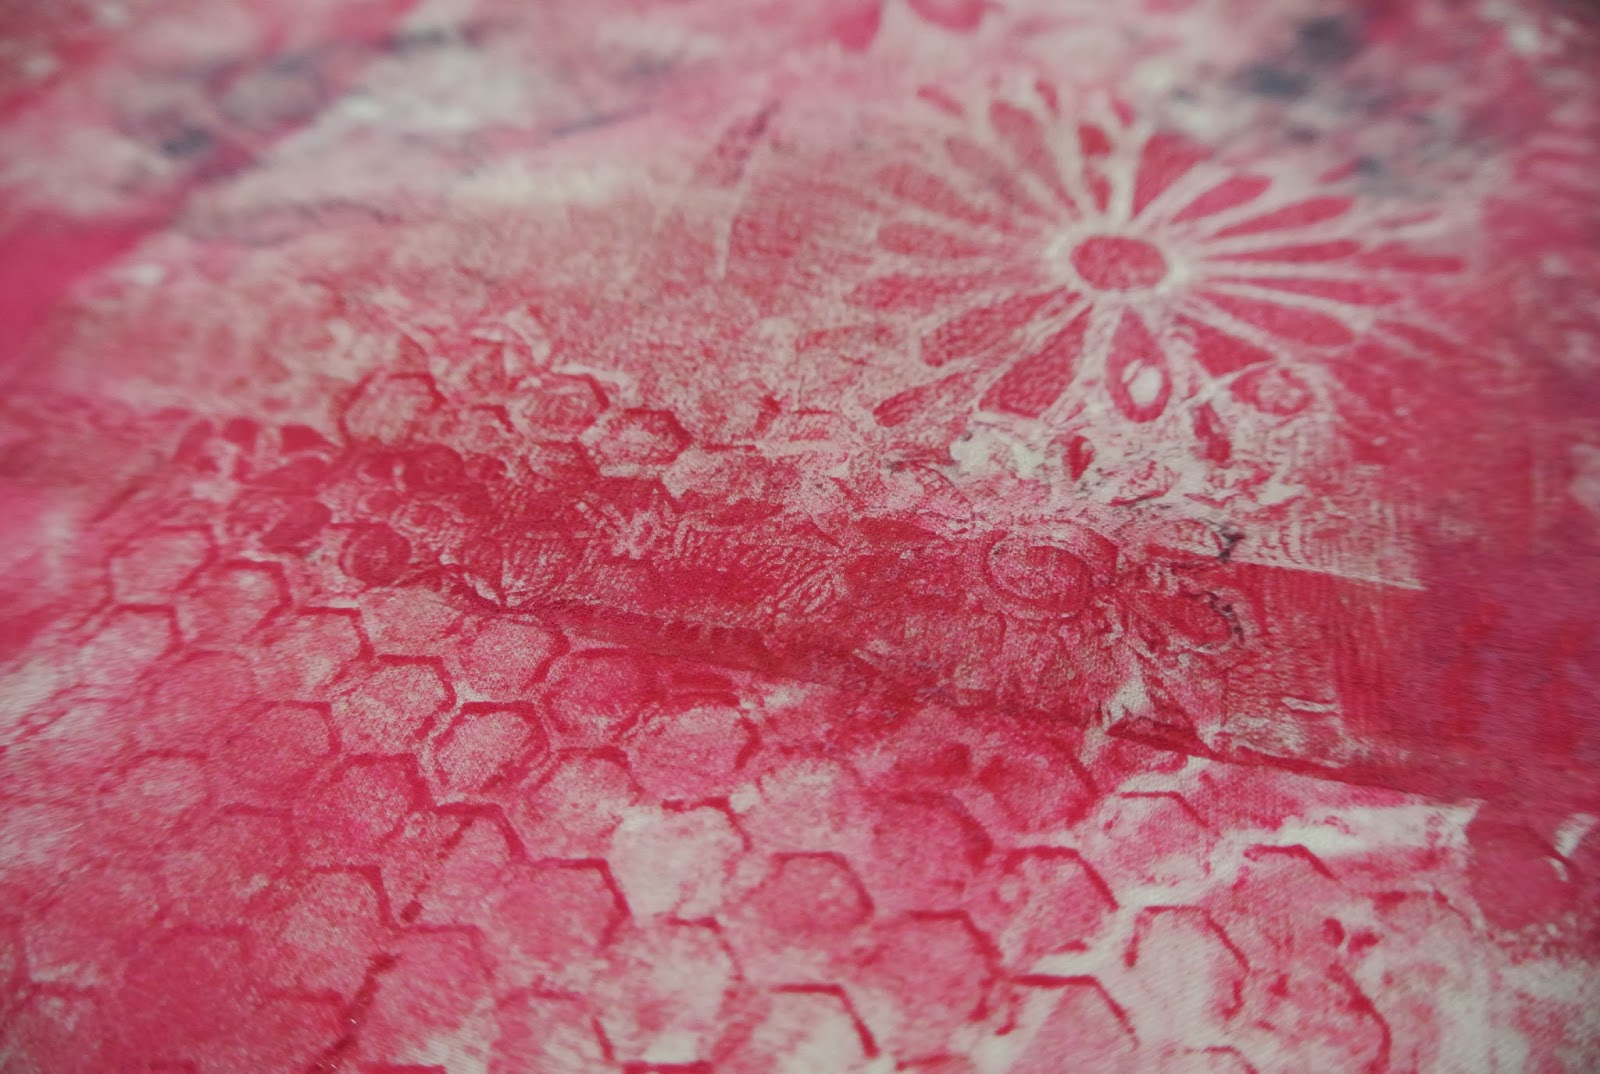

It's important for me to say here that I just used regular acrylic paint on the muslin. I later learned about GAC 900, which when mixed with acrylic paints and heat set makes it very easy to work with on fabric, as well as makes it washable. (Thanks, Martha for the helpful tips!) So this pillow is only for decoration. When the fabric was all dry, I laid down the stencil on the fabric and traced the design with a white fabric pen. However, I quickly realized that the pen wasn't standing out enough on the design so I had to head back to the drawing board on that one!


So after digging around in my stash (and not finding any other colored fabric pens) I decided to stencil the design on instead using black paint. So I grabbed one of the dabbers from the kit and some paint and went to work. I was liking where this was going....


Now to really get to work! I wanted this to have a special touch, so I decided to hand embroider some of the details using colorful threads. I did find this very relaxing and was able to work on it while hanging out with the kids one evening. I really need to get a thimble or something....


Everything was all embroidered and it was time for another crazy trip to Hobby Lobby to find some coordinating fabric. Have I mentioned how unpleasant it is taking a 2 year old and 5 year old fabric shopping? LOL Anyway, I found this really cute fabric.


I won't share with you the epic disaster pics of me sewing the wrong fabric sides together (it's hard to focus when your kids are climbing all over you and pulling on the fabric you're trying to sew!--note to self: wait until bedtime before attempting another sewing project!) Here is a pic of the pieces sewn together CORRECTLY! Once that was accomplished I stuffed it with Polyester Fiberfill and hand stitched the opening closed.


And the finished product!


Halloween is near, do you have any projects planned? I'd love to hear about them! Thanks for stopping by :)

Monday, October 14, 2013

October Special Guest, Tracy Weinzapfel

Hello and Happy Monday!

We have a very special guest with us today, Tracy Weinzapfel! We simply adore Tracy and love her quirky and inspiring Mixed Media Mondays and fun, creative style.


Before we get to Tracy's first project, let's get to know her a bit more.

What you see, is what you get....I put it all out there every day. I am the mom of three great kids (16 year old son and boy/girl 11 year old twins). For me, every day is a Nikon Moment. I am happiest behind my camera capturing life's every amazing second. I live life  with a creative edge and know that art is my calling. When I am not taking photographs I am using them in my freelance design business.  Most evenings you can find me in my art studio creating pieces using all types of mediums including my favorite acrylic paints, inks and adhesives.  I am honored to tell the amazing stories of each and every person I work with. I am proud to have created albums for movie stars our very own President of the United States, Barack Obama!
I try to live life to the fullest every day and for the most part you can catch glimpses of my crazy adventures on my blog www.tracywburgos.typepad.com. I never know where life is taking me but one thing I know for sure is I will have my camera in hand to capture it!
Now on to her first amazing project!
 
Frog Dog Studio asked me to design with their kit for October. It is always an honor to be asked to design something and challenge myself. I was asked to create two mixed media pieces and this is the first one in my brand new 8.5" X 8.5" Watercolor Journal (feels so great to start a new one!) Here is the October Kit:


and here is my first project!


This was fun to create....and simple.
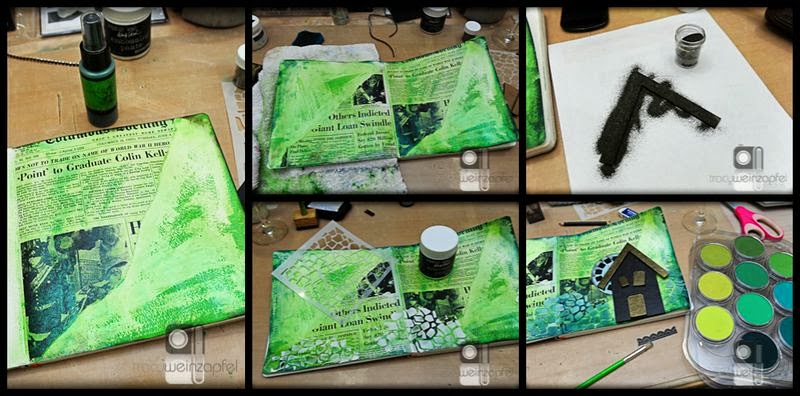
1. Adhere newspaper with Gel Medium
2. Spray pages with Lindy's Stamp Gang
3. Heat emboss roof, doors & windows and paint house black
4. Use embossing paste with stencil and color with PanPastels
5. Adhere black trim
6. Doodle on house with white pen
7. Adhere all items to page
8. Journal with Black Sharpie & Uniball Signo White pen


This was a fun way to start this journal...


Here are the details.,...


From my Studio to yours....Thanks for stopping by and thanks Frog Dog Studio! It is so fun to just step out and play...


 "Fulfillment and success in life lie in your ability to use your entire mind to achieve your goals, dreams and desires. Take sufficient time to spend with
yourself, without external interference. You’re worth it." 

WOW!  This is such a gorgeous and beautiful project!  Love her style and how she used the kit!  Thank you Tracy for sharing your creativity with us today!.  Please take a minute to stop by Tracy's blog and say Hi!

Thank you for stopping by!  Have a great week!
 

Tuesday, October 8, 2013

October Guest Designer, Sanna Lippert

Hello and Happy Tuesday!  We are very excited today as we announce one of our Guest Designers for October, Sanna Lippert!

Thank you Sanna for sharing your amazing talent and creativity with us!  Before we get to her first project (which you will love), let's get to know her a little better!


Hi everyone. My name is Sanna and I´m originally from Finland, but Austria has been my home due to my half Austrian half Greek husband for more than 15 years now. We have two boys who guarantee for a busy family life. My day job for a medical publisher, hobbies, our family life and many other interests keep me/us busy. I have been involved with arts and crafts & music (partly thanks to my crafty mom) since I was a little child. I´ve tried several things, but paper crafting has always been my strongest passion. As a child I loved to draw for hours and hours and my older son seems to take after his mother. I can not imagine my life without crafting. I love to create, try out new things, experiment and share my projects and ideas. I was very honored and thrilled when Tina asked me to do a GDT spot for the Frog Dog Studio. Thanks for having me here!!!

Let's get to Sanna's first project!  (of MANY)


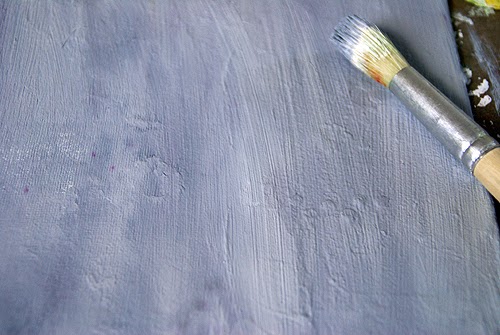
First I applied gesso and some struckture paste over the canvas and let it dry just a little.

After that I dabbed a reasonable big amount of the "Screaming Banshee Black" Magicals powder that i had mixed with water over the slightly damp surface and then mixed the two layers together with a paint brush and let everything dry out properly. This way I got a light grey tone for my background.


Next I took a piece of watercolor paper and outlined the skull stencil with a pencil on the paper. 
After that I mixed all "Magicals" colours with some water in a plastic painting palette. I varied the amount of powder depending on how dark of light a tone I needed. Then I just painted the skull light grey, let it dry and as it was all dry, I started adding more color to the areas I had outlined with a pencil earlier. 

After that I sprayed a piece of white paper with the orange and purple "Starburst" spray ink and stamped some leaves on it with black waterproof ink. 
I fussy cut the leaves and later used them around the skull for decoration.

After the canvas background had dried up completely, I stamped with black ink and the scallop border around it for more detail. 
Next I made some journaling labels for my canvas and used the "Magicals" colours for coloring the background and after that just wrote the words down using a black Sharpie.


The skull eyes are made out of the stamp sheet and from the book page sheet that were on the kit. I colored them in and/or added some "Magicals" on them with a paint brush and let the color dry properly. The "unlucky number" 13 rub-on matches the theme perfectly, so that is why I added it to decorate one of the eyes. The other one is a piece of a playing card punched out with a circle punch and colored in with "Magicals".


Now all I needed to do was glue everything on their places, add some decorative details with a black and a white Sharpie and with a stamp that was in the kit and my canvas was all done.  


WOW - this is amazing! That is such a wonderful and creative project!  Thank you Sanna! Be sure and stop back later in the month for another project (or two or three or four) from Sanna.  We can't wait!  Please stop by Sanna's Blog and say hi! 


Thanks for stopping by!

Thursday, October 3, 2013

Beauty in Imperfection....

Hello and Happy Thursday!

Tina here again today with an Art Journal I created using the Exclusive Frog Dog Studio stencil in the Limited Edition Kit.


I love the beauty in Sugar Skulls.  I love the bright colors, the floral designs, and the delicate details.  When I created this stencil, I envisioned Beauty, in Imperfection.

I thought this stencil would make for a wonderful Art Journal spread.  I used the negative space to create detail and used bright and bold colors!

Before we get to my video tutorial today, let me share several close-ups.


And my video...


For my second project, I wanted to create another project with the Exclusive stencil, so I used the 9x12 canvas included in the Limited Edition kit and created a simple canvas full of texture, color, and lots of Lindy's Stamp Gang product.


I started creating texture by adding Glitter Paste to my canvas with a flower TCW stencil I had in my stash.  I let it dry completely before adding color.

I layered several Lindy's Moonshadow Inks, Lindy's Sprays, and some sprays from my stash to create the background.  I love how the Glitter paste peeks through the inks and sprays.


Once I was happy with my background, I outlined the stencil using a Embossing Pen.  I added the embossing powder from the Main kit and melted.  I am so happy with how this turned out.


I had never used Lindy's embossing powder before this kit, but I must say I'm addicted.  I have added several additional colors to my personal stash and have fell in love with embossing all over again.

What product have you used lately that you love?  Have you re-discovered a product.  We'd love to know.

Thank you for stopping by today!  I hope you have a great week!