Showing posts with label Watercolors. Show all posts

Monday, November 18, 2013

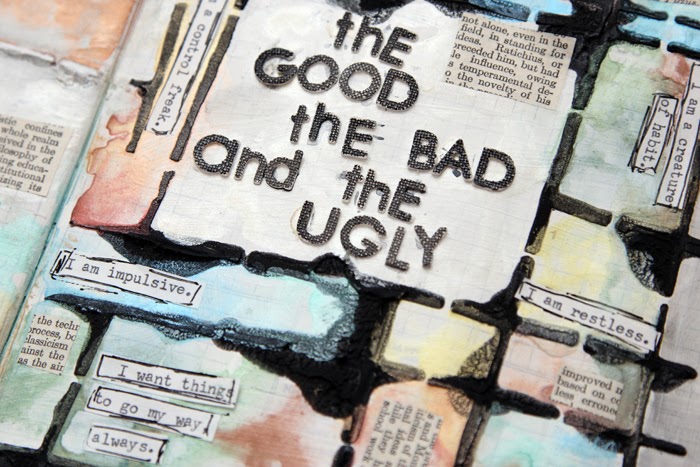
The Good, The Bad, & The Ugly...

Hello and Happy Monday!  Tina here today with another Art Journal spread tutorial!

I LOVE creating with watercolors, and the Niji Pearlescent watercolors in the November kit are full of glimmer, glam, and shine!  Love them!

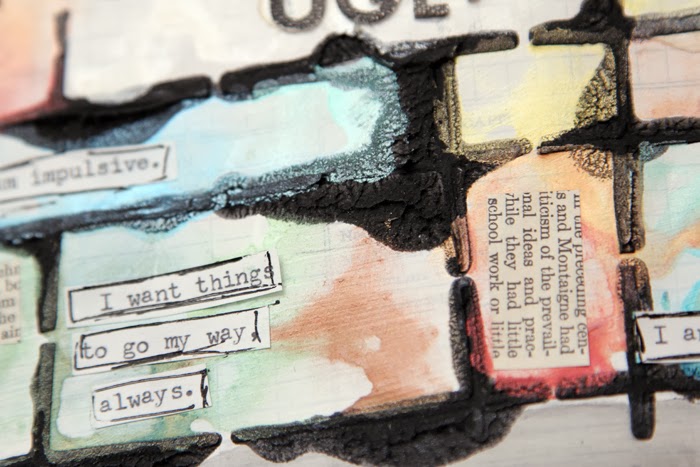
I wanted to get a little more personal on this Art Journal spread, and journal about my good and bad qualities.  Sometimes, it is really hard to admit your bad qualities, but writing them down is a step in the right direction for adjusting them.


I love this grid stencil from Catherine Scanlon.  Since I am pre-writing this post, I'm not sure if they are still available in the shoppe...but if so, it is a great, versatile stencil!

Before I share my video tutorial, here are a couple of close-ups of the spread.


I think this is one of my favorite Art Journal spreads to date.  :)

And here's the video!


Thank you for stopping by today!  I hope you enjoyed my project and were inspired to share yourself on your next Art Journal page.


Tuesday, November 12, 2013

November Challenge, Watercolors!

November - Watercolors!

Hello and Happy Tuesday!  Tina here today with a new Frog Dog Studio challenge.

Using our November kit as inspiration, our November challenge is all about Watercolors!  Watercolors are a new, hip mixed media trend and we simply love the watercolor look!


Here are the details:

1.  Create any project, art journal page, mixed media layout, off the page project, etc. that uses watercolors.
2.  We love to see new and fun ways to use product, so if you have discovered a great new secret, please share it with us.
3.  A randomly chosen winner will receive a $10 Gift Certificate to the Frog Dog Studio store. 
4.  You may enter as often as you want, but each entry must include a new project.
5.  The use of the Frog Dog Studio November kit is not a requirement, but is appreciated!
6.  The challenge will close on November 26th and the winner will be announced shortly after that.
7.  Link up your entries below, with the InLinkz tool.


Happy Creating!

Wednesday, November 6, 2013

Texture Tips with Melissa-Adding Texture to an Art Journal Coloring Page

Good morning! Melissa here with this month's texture tips. When I received this month's kit and saw the coloring pages from Catherine Scanlon I was totally excited. Some of my favorite childhood memories are of me and my grandma coloring together. She always had a good stash of coloring books at her house, plus the 64 count box of crayons with the built in sharpener! (fist pump!!)

Also included in this kit are the watercolors. I was looking at everything together and I decided to do different pages in different mediums. So for the first coloring page I used the watercolors for my main source of color. I added in the embossing powder to the middle of the flowers and some of the glitter (attached using the Glossy Accents from the kit). The embossing powder adds a nice, shiny texture to the page. And of course so does the glitter (plus it's just a really gorgeous color!)


Next I used the gel pens to add some accents. I used the green along the stems and the blue to fill in the dots. These pens also offer a smooth shiny texture.


As I was digging around in my stash I found a packet of words from Tim Holtz, so I used them to create a little phrase that I liked. I stuck them in the empty spot of the coloring sheet.


To finish, I cut around the edges of the page and found a background in my art journal that needed some help (ok, it was a really ugly epic fail page that I've always hated) and glued it down right over the top. Now it looks so much better :)


How do you cover up journal pages or mistakes that you make? I'd love to hear about it!

Monday, November 4, 2013

'A Blank Canvas' November Edition

Hello and Happy Monday!

Tina here today with my 'A Blank Canvas' series.  Each month, I share my creative process on how I transform a blank sheet of chipboard into a Mixed Media layout, using the current month's kit supplies!

Let's take a peek at my layout.


The warm, beautiful colors in the November Kit(s) really inspired me to create a autumn colored palette.  These are some of my favorite colors to create with.

Before we get to my video tutorial, here's a couple of close-ups of the embossed stamping, watercolor paints, and stenciled designs.


I also cut apart (this killed me to do this - but it just had to be done-HA!) several flowers from one of the Catherine Scanlon Exclusive Frog Dog Studio Art Journal Coloring pages.  I outlined the flowers with the Sakura Metallic pens included in the main kit.  Simple, but beautiful!


That's enough of a teaser!  Here's my video tutorial!  I hope you enjoy it!


Thank you for visiting with us today!  I can't wait till you see the Design Team projects and tutorials this month!  There are awesome!

Have a great day!


Wednesday, October 30, 2013

November Kit(s) Reveal!

Hello and Happy Wednesday!

Today, we are announcing our November Kits and you don't want to miss these!  The November kits are full of fall-time colors and whimsical Exclusive Art Journal Coloring pages!

Here is the November Mixed Media Kit!


Here is what you receive!

(1) Exclusive Catherine Scanlon Art Journaling Coloring Book, 4 pages
(1) Niji Pearlescent Watercolor Set
(1) Tim Holtz Distress Glitter, Mustard Seed
(1) Tim Holtz Distress Glitter, Fired Brick
(1) Sakura Glaze Pen, Turquoise
(1) Sakura Glaze Pen, Hunter Green
(1) Sakura Gelly Roll Pen, Gold
(1) Sakura Gelly Roll Pen, Silver
(1) Sakura Gelly Roll Pen, Copper
(1) 2 pack, Sakura Souffle Pens
(1) Lindy's Stamp Gang Embossing Powder, Sunrise Salmon
(1) .5 oz bottle of Glossy Accents


Valued at over $45

Here's a peek at the November Design Team projects!


If you want to see the entire Design Team Gallery, hop on over to the Frog Dog Studio website!

In addition to the amazing November Mixed Media kit, we are also offering a Paper Add On kit for November.  Keeping with the fall time theme, the Paper Add On kit is the paper-crafters and mixed media artists dream!  If you are interested in one of these kits, you better hop on over to the store and order yours today!

(Kit Subscribers receive an advanced peek at the newest kits and can place a pre-order for any Paper Add On or Limited Edition kits!  What a great benefit to subscribing!)


The November Paper Add On kit is $25 (plus shipping), with a total value of over $35!  Here is what is included in this amazing kit:

(1) 12x12 Bo Bunny Chipboard Sheet, Autumn Song
(1) 6x6 Bo Bunny Paper Pad, Autumn Song
(1) Bo Bunny Stamp Set, Autumn Song
(1) Maya Road Star Mini Canvas Album
(1) Maya Road Wooden Heart Set
(3) Maya Road Butterfly Stick Pins
(1) Lindy's Stamp Gang Starburst Spray, California Poppy Gold
(1) Lindy's Stamp Gang Starburst Spray, Canna Lily Burnt Orange
(1) Lindy's Stamp Gang Embossing Powder, Oakleaf Olive
(2) 12x12 Sheets Canvas Corp Kraft Tissue Paper


Here's a peek at several Paper Add On Design Team projects.


Both Kits are available at the Frog Dog Studio store or if you are interested in subscribing to Frog Dog Studio Mixed Media kits, please email me at frogdogstudio@hotmail.com.  Subscribers are guaranteed a kit each month and advanced peeks of Add On's and Limited Edition kits. Don't miss out!

We have another month Full of Design Team tutorials, how-to's and tips!  You don't want to miss it!

Thanks for stopping by!  Have a great day!

Monday, August 19, 2013

Have the courage....

Hello and Happy Monday!  Tina here today with another project from the August Kit!

I'm relatively new to the world of Art Journaling, but I love the creative expression and artistic outlet that comes with creating in an Art Journal.  It is a free flowing and open way to create, experiment, and memorialize your daily experiences.

My tutorial today shows how I created this serene and peaceful Art Journal page, full of color, fluidity, and memory.

The quote I chose to use for my page is one that resonates well with me.

"One cannot discover new oceans, unless he has the courage to lose sight of the shore."  Andre Gilde


And several close-ups before we get to the video...


I hope you enjoyed my creative journey today!  Please stop back tomorrow for more inspiration and creativity!


Saturday, August 17, 2013


ATC Happy!! 


Artist Trading Cards are so much fun!  There's just something about their size...AND the fact that you can create several in one sitting!  They are also very fun to trade.  There's something so magical about getting REAL mail in your mailbox...ESPECIALLY when it's a ONE OF A KIND made by hand!

Our August Kit was so fantastic that I got a little carried away creating cards this month.  Below are some of the cards I created with a bit of explanation with each one.


First Up, Doodle Cards


The Wooden Whales in our August Kit were SO COOL, they inspired me:)


I Started by applying a few coats of Gesso to the blank card found in the Kit.

At first, I thought I might like a pattern under the Doodled Whale and lettering, but later decided it would "fight" with the drawing.  (you can see in the photo above that there is stencil pattern that I covered up later with modeling paste) I used a Faber-Castell black multi-liner XS for the doodle and lettering.


Next I added the Modeling Paste.  I have a mini off set spatula from my kitchen that comes in handy for this...but you can use whatever you have on hand (plastic knife, old gift card or credit card, etc.)


Next I gave it some color with my KOI travel watercolor set.  Lightly mist the color you want to use and apply the color with a brush to the DRY modeling paste.  


The last thing added: Yummy Glitter Paste from our Kit.  I really love the consistency of this paste...it's so easy to work with, it just glides on & clean up is easy... AND our kit includes a VERY GENEROUS jar! I suspect that I will be adding this to many of my December Holiday Projects!!


Balloons take flight


I LOVE this background!  It came in the kit perfectly sized to fit the blank ATC cards...Just glue and go!  I added a little Gesso with my fingers to soften it's appearance and to lighten the background so the "Doodle" would show up.

Doodling is kind of like yoga...it's very therapeutic:) I confess, I often listen to Audio Books while I work...sometimes you can see a sentimental tear on my pages:)

I printed off the sentiments, cut them out and added a touch of yellow using one of my favorite products...see below.


Next Up, vintage fun!


This background was also sized to fit.  I love the colors.  I added a little of the Neocolor II crayon to the edges, a bit of washi tape to the corner, a "joy pin" with ribbon, a sentiment covered with more of the yellow Neocolor II crayon, a tiny gem & a cute button from the kit.  This one came together so fast, thanks to our amazing August kit!


The details of the card above go like this...
I covered the blank card with Gesso.  I then stenciled the diamonds with more Gesso and applied the SUPER COOL Viva Inka Gold with a wet brush.  What a brilliant product!  
I then applied the Sentiment & Ephemera from our Great August Kit.  I wanted more of that cute "angel!"
Next, I added the oval stencil and edge distressing with Ranger's DISTRESS INK in Walnut.


Last but not least...my Butterfly Card


I first applied the Inka-Gold to the blank card.  Next, I cut the "film strip" from our Kit in half and adhered it to the Dry card with the Studio Multi-Medium.

On a separate piece of Mixed Media Paper, I doodled flowers.  I cut this to fit and attached it with the Studio Multi-Medium.  (Thank you Tina for exposing me to this AMAZING product!! I'm hooked)


 Next, I took one of the "Wooden Windows" from our kit, glued on the Butterfly from the Kit's ARTChix Ephemera sheet, added a little of the Viva Inka-Gold to the edge along with the word "Transformation"  that I printed off with my computer, & covered it with "Glossy Accents."  


I love how the word looks slightly transparent.  This was a happy accident:)  I meant to print it off on card stock, but forgot to put a sheet in...I didn't want to waste the print, so I used the word printed off on regular computer paper.  Because it is thinner than card stock, the Glossy Accents caused the paper to break down a little, creating this transparent look...I like it!  

(not all my accidents are happy ones!)

I mounted the "Window" on a Square of Blue Card Stock to give the ATC a little more color.

As you can see, I had ALOT of fun with the ATC cards!!!  Hope you do too!  As always, would LOVE to see yours! Post them on our Facebook Page!!

It's an honor to "hang out with you!"

See you soon! 

Creatively Yours,
sue