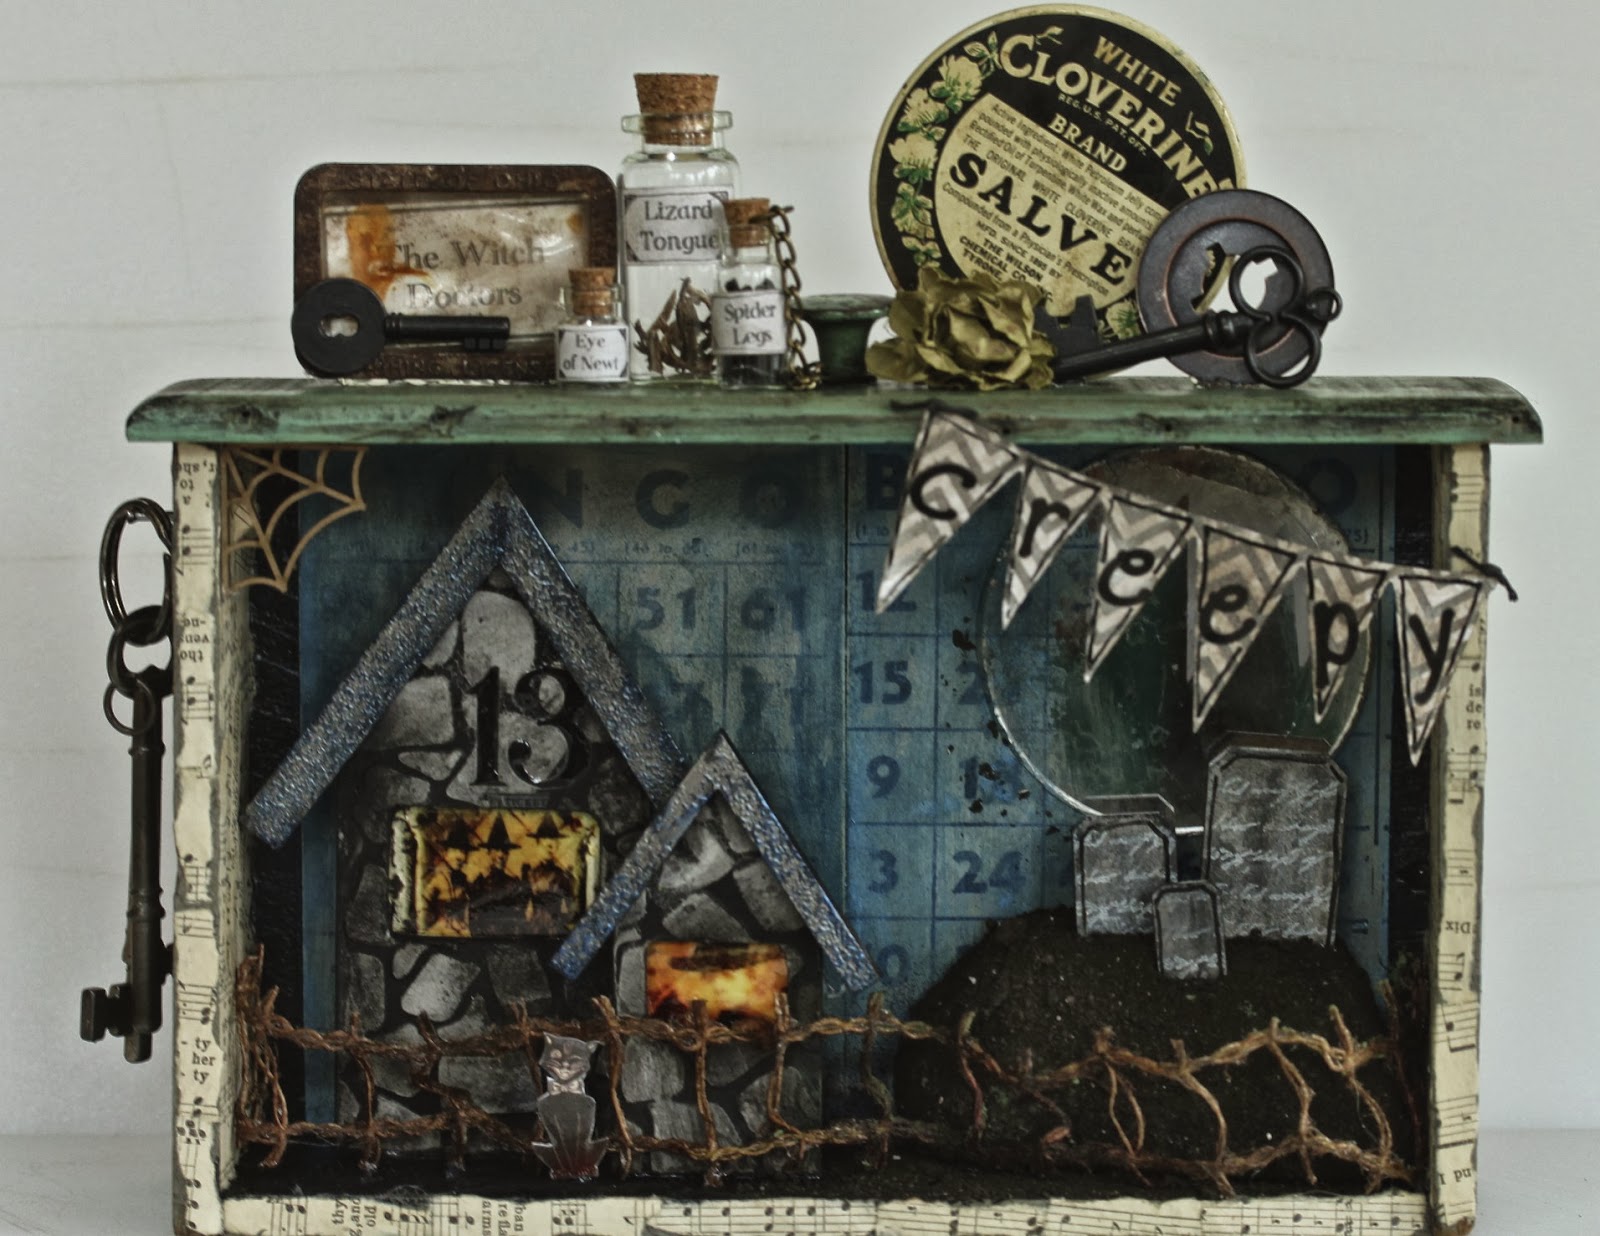
I have thoroughly enjoyed our October Kit, and upon receiving it, I knew it was just what I needed to make the "vintage drawer scene" I have been waiting to create.
I marvel at the depth our monthly kits provide...Tina makes it easy to create...So many options!
I had taken the drawers out of this little antique in order to store my Copic Markers.
I knew I would use the drawers for something, so they have been patiently waiting:)
I began with the background that would be placed in the drawer "bottom"
seen behind the houses in the scene. These are old Bingo Cards.
Above is Lindy's Stamp Gang's Moon Shadow Ink in
Buccaneer Blue. I first covered the card with a very wet sponge brush, then spattered more with a liner brush.
(I used this color for several projects this month...love it)
TIP: When you paint one side of something it will begin to "buckle." Painting the other side
(with anything) will correct this.
"The scene" takes place at the home of these three lovely witch doctor sisters:)
I found the images here, cut out the size that fit my Art Parts house window, and covered it with Glossy Accents to seal, protect & add dimension.
I painted the houses with black gesso
(any paint would be fine, the gesso was just handy)
I took our Frog Dog Exclusive Stencil out to add texture to the houses using the Studio 480 Wendy Vecchi Embossing Paste....it goes on like "butter" I REALLY LOVE this product!!
(Having exposure to Frog Dog Studio has opened up my "tool box" to SOOOO many new products!!)
Next, I "inked up" the houses with and embossing pad, and added Lindy's Stamp Gang Embossing Powders in Midnight Gold & Blue.
Just sprinkle it over the wet embossing ink, tap off excess, then use a heat tool to activate the "magic."
LOVE how it looks:)
*Note: I did add some white gesso later, to help the houses stand out a little more from the Background.
To my surprise, when adding Lindy's Stamp Gang Embossing Powder in Cosmic Pink over black, it turns a very delicious blue:)
I added just a few touches of the Moon Shadow Ink in Long John Silver.
To the house, I rubbed on the number 13 from a
Tim Holtz Transfer.
(Advantus Idea-Ology Remnant Rub On Numbers)
For the Fence, I happened to "spy" a piece of twine ribbon in my stash that reminded me of a fence. I didn't have any "STIFFY" (a product used to stiffen ribbon) but had some PVA.
(PVA-book binding glue)
So....I saturated the ribbon with glue, and then hung it outside to dry.
When the Twine Ribbon was dry, I used Tim Holtz Distress Ink in Walnut to give it some color.
For the "Graveyard" next to the "Dr.'s Office", I took these Art Part pieces and covered them with Lindy's Stamp Gang Moon Shadow Ink. (Long John Silver)
I used a stamp with "script" to add character to the Gravestones.
...using Brillance Ink...a favorite of mine for dark backgrounds.
For the "hill" I used florist foam.
cut with a serrated knife.
Next, I added craft glue and sprinkled REAL DIRT all over it.
(my husband began to question my mental state
at this point, haha)
Glue and Dirt were also added all over the entire "ground" of the scene.
Here you can see that I added some torn pages from a vintage book to the edges of the drawer using matte medium.
For the top of the drawer, I added the VIALS from our kit
(I happened to have the largest one in my "stash")
I printed off the labels, using the font
"SANDWICH PAPER."
I used a XS Pitt Pen to "box in" the words and then added a
little detail in each corner to give it a vintage look.
I added a chain to the "Spider Legs" Vial
(Tim Holtz, Idea-ology Swivel Clasp)
The Lizard Tongue is cut up pieces of the "left over" stiffened twine ribbon fence:)
ABOVE, housing the "Witch Doctors" sign, is and old fishing license tag. I think this is one of my favorite elements of the drawer. I have been waiting for years to use it on "just the right project!"
I had this old "Salve" container and joining it in this grouping, are a few odds and ends I had
in my never ending stash:)
The last 4 additions to the drawer were the Vintage keys, (hanging on a small nail) the "Creepy" banner, the cute Wooden Spider Web, and the Cat Image.
(last 2 from our October kit!)
Ps. I covered the Cat Image with Glossy Accents to give it some "Body" to stand.
I hope you are inspired to create something
"out of /In the box"
with our FABULOUS OCTOBER KIT!
As always, it is a joy to share with you,
Sue
\