Good morning! Today I am sharing with you a project I have created using several items from this month's sponsor, Sin City Stamps.
To begin, I covered one of the large wooden panels with a cool gear themed edge with gesso and let it dry. Then, I used some red acrylic ink to lightly paint the background. A light dusting of Tim Holtz Distress Glitter in pink was also added while the ink was still wet.
Next, I used the Pan Pastels from the kit and worked them into the background, as well as added some color to several of the gear themed die cuts. I also covered one of their chipboard keys with gold Stickles for some sparkle :)
For the final touch on the background, I used the large gear laser cut page as a stencil and sprayed some Dylusions spray ink in Postbox Red.
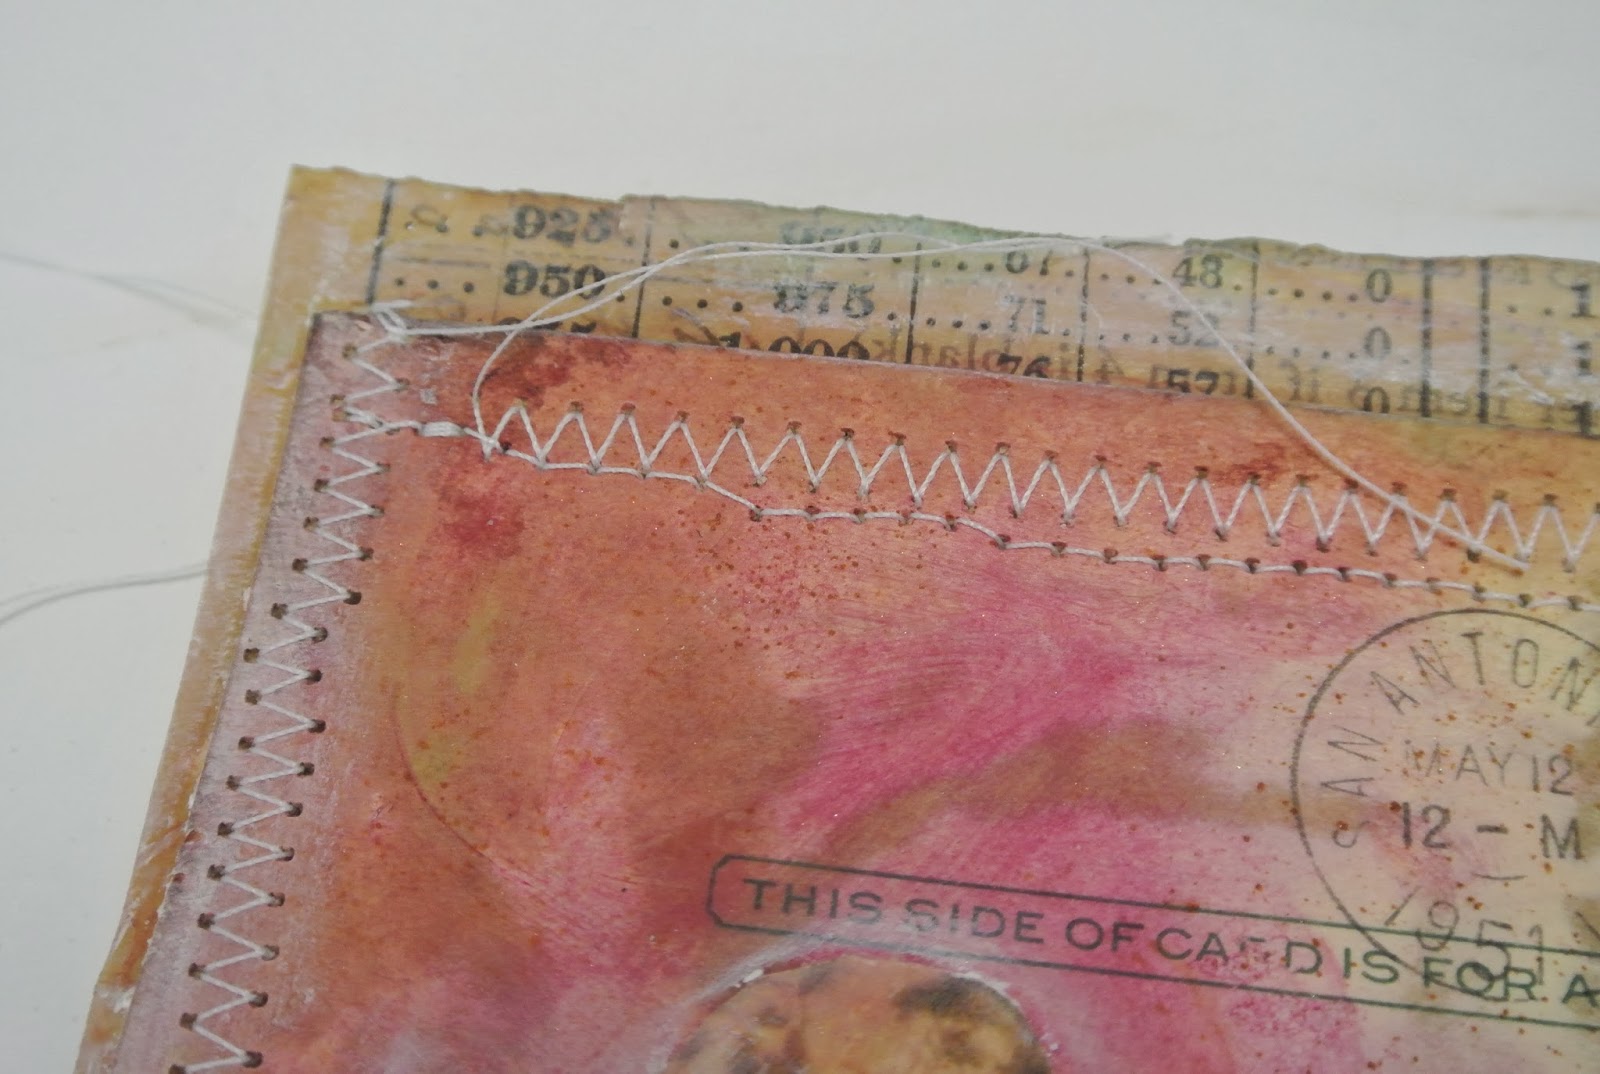
A few weeks ago, I covered several pieces of vintage papers with clear resin from Amazing Crafting Products. TEXTURE TIP: I love the clear resin on vintage paper, especially the older thin papers. It adds a transparent quality that is really interesting. I decided to use some of these in this project, along with some clip art from the Frog Dog kit. I blended in some of the Pan Pastels to add some color, then collaged the pieces together and added some stitching around the edges.
On the collage I also used one of the Sin City Stamps and some Versamark ink. Then I used Lindy's embossing powder to bring out the design and add a smooth texture.
I followed up by edging all of the pieces with the Gelatos from the kit to give it an even more distressed look. Then I adhered the mini collage to the large board and added several of the wooden gear pieces and the cutouts that I had colored before with the Pan Pastels. I added a piece of rosette trim that I found in my stash, one of the stick pins from the kit, and a few other little bits from my stash to complete the project. Here is the final result:
And a few close ups:
Showing posts with label Lindy's Embossing Powder. Show all posts
Tuesday, February 18, 2014
Friday, December 20, 2013
'A Blank Canvas' December Edition
Hello and Happy Friday!
Tina here today with my 'A Blank Canvas' series. Each month, I share my creative process on how I transform a blank sheet of chipboard into a Mixed Media layout, using the current month's kit supplies!
Let's take a peek at my layout.
The festive, bold colors of the December kit were perfect for a vintage Mixed Media layout! Green and Red are always a go-to color combination.
Let me walk you through my creative process.
Step One: Paint Sticky Back canvas with Gesso.
Step Two: Apply Modeling Creme to canvas with Tim Holtz Stencil.
Step Three: Apply a 'wash' of Silks to canvas. Modeling Creme acts as a resist.
Step Four: Age canvas with Distress Ink.
Step Five: Cut up canvas into randomly sized rectangles. Set aside.
Step Six: Apply Gesso to chipboard and create 'stripes' with plastic fork. Apply your favorite spray and/or Ink. I used Lindy's Stamp Gang Moonshadow Inks, Magicals, and Starburst Sprays. Dry.
Step Seven: Peel backing from Sticky Back Canvas and adhere to background.
Step Eight: Paint chipboard letters with Silks and while wet, sprinkle with Embossing Powder. Heat emboss.
Step Nine: Spray top of chipboard with Spray Mist and let it drip down.
Cut randomly sized circles from Tim Holtz fabric and adhere to background.
Adhere small metal findings to background.
Using technique in Step Eight, apply Silks to edge of layout and around fabric circles and sprinkle embossing powder. Heat emboss.
Step Ten: Using Charcoal Soft Pastels, edge around canvas rectangles, chipboard alphas, and edge of layout. (this is my latest obsession. I MUST apply Charcoal to everything HA!)
Step Eleven: Add more Spray Mist and paint to areas of layout. The close-ups really show all of the fabulous detail, color and texture.
Doodle a bit around the metal embellishments and fabric circles and you have a finished layout!
I hope you enjoyed this month's 'A Blank Canvas'. Thank you for stopping by!
Tina here today with my 'A Blank Canvas' series. Each month, I share my creative process on how I transform a blank sheet of chipboard into a Mixed Media layout, using the current month's kit supplies!
Let's take a peek at my layout.
The festive, bold colors of the December kit were perfect for a vintage Mixed Media layout! Green and Red are always a go-to color combination.
Let me walk you through my creative process.
Step One: Paint Sticky Back canvas with Gesso.
Step Two: Apply Modeling Creme to canvas with Tim Holtz Stencil.
Step Three: Apply a 'wash' of Silks to canvas. Modeling Creme acts as a resist.
Step Four: Age canvas with Distress Ink.
Step Five: Cut up canvas into randomly sized rectangles. Set aside.
Step Six: Apply Gesso to chipboard and create 'stripes' with plastic fork. Apply your favorite spray and/or Ink. I used Lindy's Stamp Gang Moonshadow Inks, Magicals, and Starburst Sprays. Dry.
Step Seven: Peel backing from Sticky Back Canvas and adhere to background.
Step Eight: Paint chipboard letters with Silks and while wet, sprinkle with Embossing Powder. Heat emboss.
Step Nine: Spray top of chipboard with Spray Mist and let it drip down.
Cut randomly sized circles from Tim Holtz fabric and adhere to background.
Adhere small metal findings to background.
Using technique in Step Eight, apply Silks to edge of layout and around fabric circles and sprinkle embossing powder. Heat emboss.
Step Ten: Using Charcoal Soft Pastels, edge around canvas rectangles, chipboard alphas, and edge of layout. (this is my latest obsession. I MUST apply Charcoal to everything HA!)
Step Eleven: Add more Spray Mist and paint to areas of layout. The close-ups really show all of the fabulous detail, color and texture.
Doodle a bit around the metal embellishments and fabric circles and you have a finished layout!
I hope you enjoyed this month's 'A Blank Canvas'. Thank you for stopping by!
Wednesday, November 27, 2013
The Girls of Fall
Good morning! Melissa here with a tutorial on how to create some simple little "girls of fall". These could be grouped together as a display, attached to a larger canvas, turned into ornaments…lots of possibilities! I was inspired by Christy Tomlinson's She Art girls (I took her first class years ago--so much fun!)
To create these gals, I used items from our November Paper Add On Kit. There are some beautiful fall themed items in this kit. I especially loved the BoBunny 6x6 paper pad! To begin, I gessoed four mini canvases then sprayed them with the Lindy's spray inks. Then, I just freehand cut some dresses. These papers have a sort of vintage vibe to me that I like. I glued them down on the canvases with some matte medium.
When they dried, I loosely sketched out a head and some legs. Then I mixed up some flesh colored paint and painted their faces and hair. I also used the stamps to do some embossing on the background. I covered the stamp in Versamark Ink, then stamped it on the canvas. Then, I dusted some of the Lindy's embossing powder on top and hit it with a heat gun.
Now for the finishing touches--I added some green Distress Paint to the background. I also rubbed the piece over with Distress Ink in Vintage Photo to give it an aged feeling. Details were added to the girls using a black pen.
The last thing I wanted to add to these pieces were a few words that represent this time of year.
And close ups of each girl individually :)
To create these gals, I used items from our November Paper Add On Kit. There are some beautiful fall themed items in this kit. I especially loved the BoBunny 6x6 paper pad! To begin, I gessoed four mini canvases then sprayed them with the Lindy's spray inks. Then, I just freehand cut some dresses. These papers have a sort of vintage vibe to me that I like. I glued them down on the canvases with some matte medium.
When they dried, I loosely sketched out a head and some legs. Then I mixed up some flesh colored paint and painted their faces and hair. I also used the stamps to do some embossing on the background. I covered the stamp in Versamark Ink, then stamped it on the canvas. Then, I dusted some of the Lindy's embossing powder on top and hit it with a heat gun.
Now for the finishing touches--I added some green Distress Paint to the background. I also rubbed the piece over with Distress Ink in Vintage Photo to give it an aged feeling. Details were added to the girls using a black pen.
The last thing I wanted to add to these pieces were a few words that represent this time of year.
And close ups of each girl individually :)
Sunday, October 13, 2013
Vintage Drawer Project
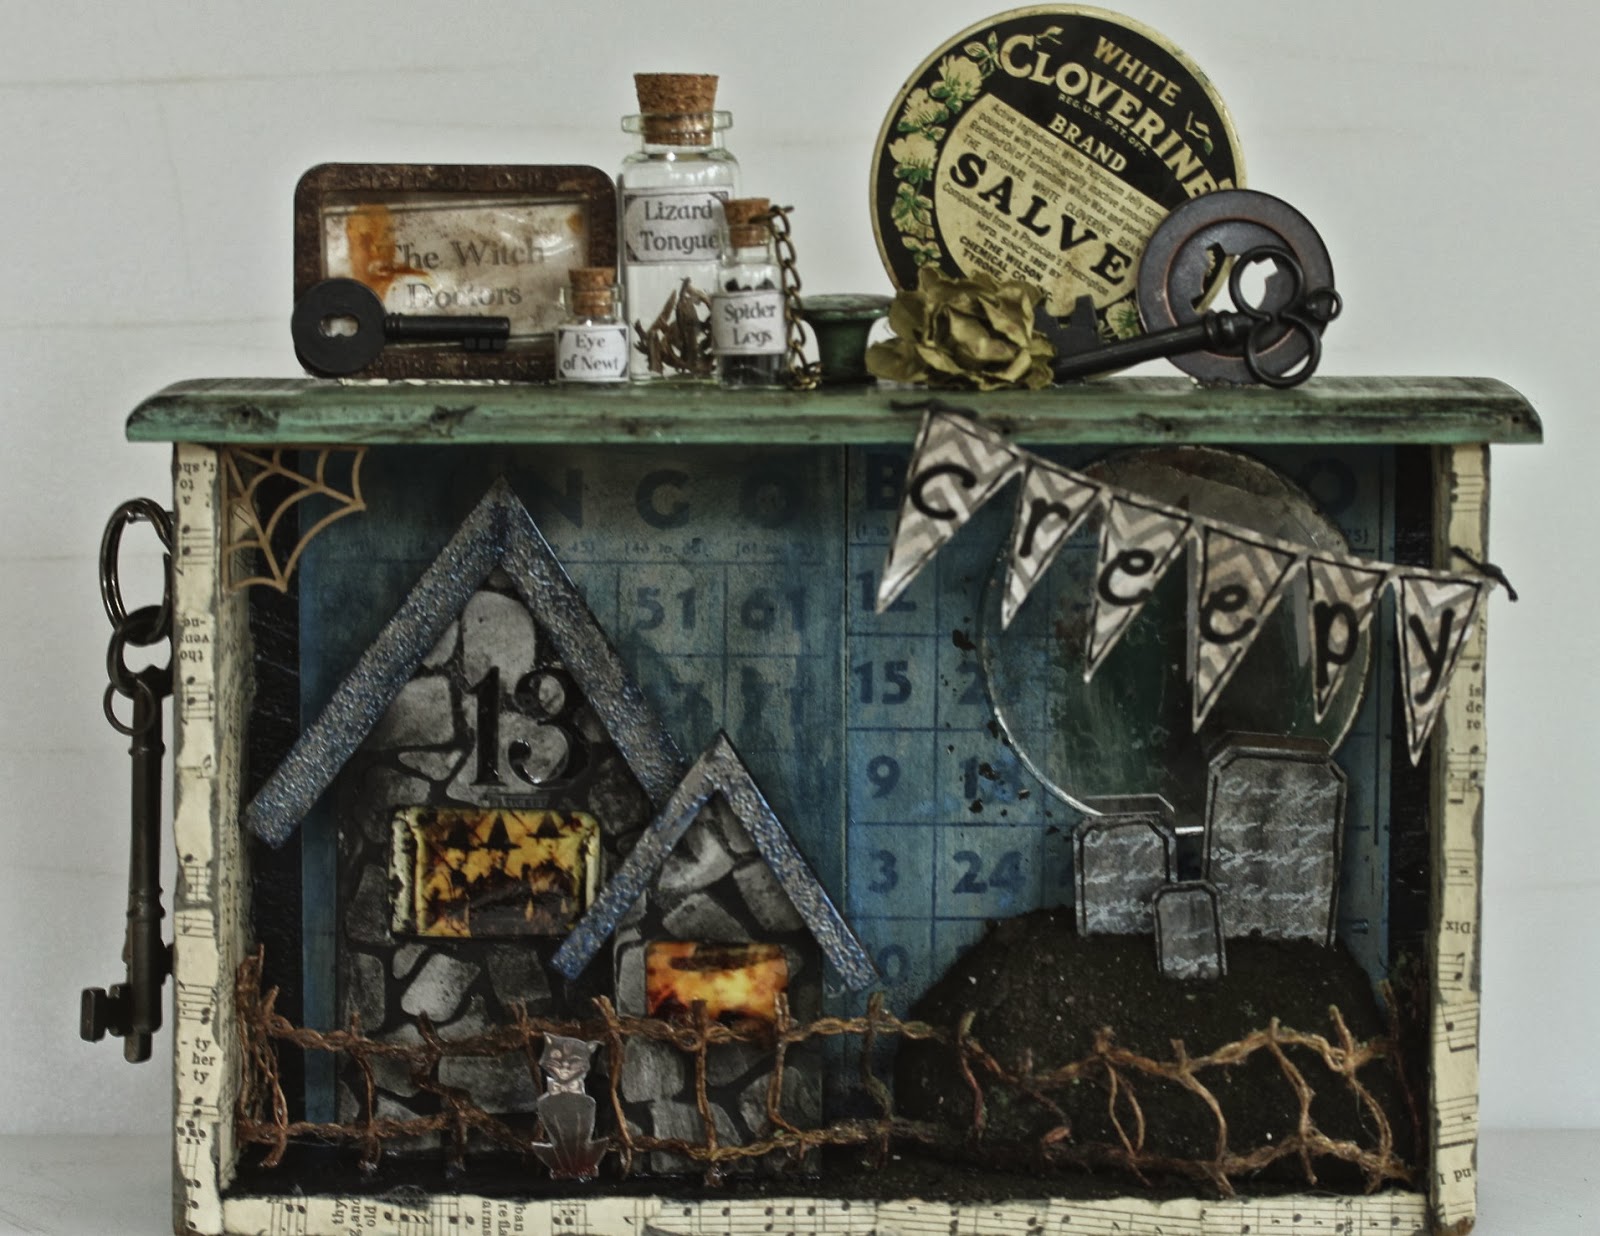
I have thoroughly enjoyed our October Kit, and upon receiving it, I knew it was just what I needed to make the "vintage drawer scene" I have been waiting to create.
I marvel at the depth our monthly kits provide...Tina makes it easy to create...So many options!
I had taken the drawers out of this little antique in order to store my Copic Markers.
I knew I would use the drawers for something, so they have been patiently waiting:)
I began with the background that would be placed in the drawer "bottom"
seen behind the houses in the scene. These are old Bingo Cards.
Above is Lindy's Stamp Gang's Moon Shadow Ink in
Buccaneer Blue. I first covered the card with a very wet sponge brush, then spattered more with a liner brush.
(I used this color for several projects this month...love it)
TIP: When you paint one side of something it will begin to "buckle." Painting the other side
(with anything) will correct this.
"The scene" takes place at the home of these three lovely witch doctor sisters:)
I found the images here, cut out the size that fit my Art Parts house window, and covered it with Glossy Accents to seal, protect & add dimension.
I painted the houses with black gesso
(any paint would be fine, the gesso was just handy)
I took our Frog Dog Exclusive Stencil out to add texture to the houses using the Studio 480 Wendy Vecchi Embossing Paste....it goes on like "butter" I REALLY LOVE this product!!
(Having exposure to Frog Dog Studio has opened up my "tool box" to SOOOO many new products!!)
Next, I "inked up" the houses with and embossing pad, and added Lindy's Stamp Gang Embossing Powders in Midnight Gold & Blue.
Just sprinkle it over the wet embossing ink, tap off excess, then use a heat tool to activate the "magic."
LOVE how it looks:)
Just sprinkle it over the wet embossing ink, tap off excess, then use a heat tool to activate the "magic."
LOVE how it looks:)
*Note: I did add some white gesso later, to help the houses stand out a little more from the Background.
To my surprise, when adding Lindy's Stamp Gang Embossing Powder in Cosmic Pink over black, it turns a very delicious blue:)
I added just a few touches of the Moon Shadow Ink in Long John Silver.
To the house, I rubbed on the number 13 from a
Tim Holtz Transfer.
(Advantus Idea-Ology Remnant Rub On Numbers)
For the Fence, I happened to "spy" a piece of twine ribbon in my stash that reminded me of a fence. I didn't have any "STIFFY" (a product used to stiffen ribbon) but had some PVA.
(PVA-book binding glue)
So....I saturated the ribbon with glue, and then hung it outside to dry.
When the Twine Ribbon was dry, I used Tim Holtz Distress Ink in Walnut to give it some color.
For the "Graveyard" next to the "Dr.'s Office", I took these Art Part pieces and covered them with Lindy's Stamp Gang Moon Shadow Ink. (Long John Silver)
I used a stamp with "script" to add character to the Gravestones.
...using Brillance Ink...a favorite of mine for dark backgrounds.
For the "hill" I used florist foam.
cut with a serrated knife.
Next, I added craft glue and sprinkled REAL DIRT all over it.
(my husband began to question my mental state
at this point, haha)
Glue and Dirt were also added all over the entire "ground" of the scene.
Here you can see that I added some torn pages from a vintage book to the edges of the drawer using matte medium.
For the top of the drawer, I added the VIALS from our kit
(I happened to have the largest one in my "stash")
I printed off the labels, using the font
"SANDWICH PAPER."
I used a XS Pitt Pen to "box in" the words and then added a
little detail in each corner to give it a vintage look.
I added a chain to the "Spider Legs" Vial
(Tim Holtz, Idea-ology Swivel Clasp)
The Lizard Tongue is cut up pieces of the "left over" stiffened twine ribbon fence:)
ABOVE, housing the "Witch Doctors" sign, is and old fishing license tag. I think this is one of my favorite elements of the drawer. I have been waiting for years to use it on "just the right project!"
I had this old "Salve" container and joining it in this grouping, are a few odds and ends I had
in my never ending stash:)
The last 4 additions to the drawer were the Vintage keys, (hanging on a small nail) the "Creepy" banner, the cute Wooden Spider Web, and the Cat Image.
(last 2 from our October kit!)
Ps. I covered the Cat Image with Glossy Accents to give it some "Body" to stand.
I hope you are inspired to create something
"out of /In the box"
with our FABULOUS OCTOBER KIT!
As always, it is a joy to share with you,
Sue
\
Subscribe to:
Posts (Atom)