Showing posts with label Sin City Stamps. Show all posts

Wednesday, February 26, 2014

Pan Pastels, Gelatos, Stamp, Collage! February Kit Happiness!!


The February Kit inspired me in so many ways!  Working with all the elements of Gelatos, Pan Pastels, stamps, and collage, fills my soul.  Makes me happy!!!  The Gelatos and stamps give a strong image, while the Pan Pastels give a soft look.    Mix both for contrast on your layout.  Soft and hard, simple and detailed.  It all adds interest to an art piece.  This is a journal page.


Started out soft with Pan Pastels.  Even with just the pink and green in the kit, you can create a stunning background.  As my other works, I like to do patches of Gelato color - this time I used a damp paint brush to spread the color out and break down the binder.  The Pan Pastels like to adhere themselves to the Gelatos.  A marriage made in heaven!!


I used Sin City Stamps - our partner this month.  Look at stamps in different ways.  I wanted the music so I left the background and collaged over the rose.  Whatever way you decide to use your stamps is the right way to work.


Random stenciling with a contrasting color of Pan Pastels adds a strong contrast.  With the kit, try using the pink for the background and stenciling letters or patterns with the green!  It will look awesome.  Note:  Look at the flowers...they were pink, but made red with Pan Pastels!

Use your tool in the kit and draw the pastel into the stencil, not tapping or just moving over the surface.  Right to left, then left to right.  I like to be hap-hazzard and not use the whole the whole stencil for a free form look.


The "U" chipboard was done by coloring with a Gelato color, then using the damp brush to blend in.  I also used the brush on the end of the Gelato to pick up more color to darken various areas.  With the February Kit, you might want to add some white as a highlight as well.

PLAY PLAY PLAY PLAY is my Mantra!!!

Don't think, just feel and do!!!

Cre8tivelea Yours - Lea

Monday, February 24, 2014

Honoring the Heart-A Mixed Media Board Book

Good morning everyone! In honor of February and all things "love", I created this mini board book honoring the heart using the Faber Castell mixed media journaling boards from this month's kit. I wanted to do a different background technique for all of the pages.


For the first page, I started with the black Gelato from the kit. I just rubbed it right onto the surface and added water to create a smoky background. I made the dots with the white Gelato and highlighted them with a red Faber Castell Big Brush pen. I added the doodling with my white gel pen. I had these cute mixed media stickers that I received from my sister in law for Christmas, so I altered this one by adding the valentine and label from the kit clip art and Stickles to her crown. I found a heart quote from a piece of old paper in my stash and cut that out and attached. Here is a close up of the finished page:

For the second page, I wanted a painted background. I finger painted some of my favorite colors on the background, then very loosely painted a flower shape with black paint and a thin brush. I added some highlights with the white paint.. I also used the Sin City stamps in the background, as well as dots from a Ranger paint dabber. Very simple, but colorful and fun to do!


Page 3 was a fun one to create. I started with a background of Pan Pastels. Then, I stamped with the rose stamp from Sin City stamps and Versamark to create a resist. Next, I laid down a stencil and used the Pan Pastel through that was well. It was cool seeing the pattern from the stamps come through the stencil. I sprayed with fixative, and let it dry. Finally, I created the horizon line at the bottom using my Aqua Letraset markers and smudged it in. I added another little mixed media sticker girl and attached another quote.

For my "fearless heart" card, I started the background with Pan Pastels again. Next, I rubbed an area with the white Gelato from the kit to create a highlight for the clip art heart I added. I found a little corner stamp in my stash and stamped that in the corner with black StayZ On ink. Then, I took a chipboard key, coated it with Glossy Accents and Distress Glitter and attached it to the card with my hot glue gun. I also added the Prima button. When it was all pieced together, I added a thin layer of Glitter Structure Paste in Magenta.


For the fourth card, I used Distress Paints and a stencil to create the background. I added a strip of washi tape down the middle and added another of the mixed media sticker girls and a "loved" label. I hand drew the border with a pencil, then filled it in with my markers and gel pens.


For the last page, I did stripes of Gelatos in pink, gold, red, and yellow. I added some water and used downward brush strokes to create a blended effect. I used a stamp from Sin City as the focal point. Then I used my Letraset Aqua markers to create the "grass" area at the bottom. I added a few doodles with my gel pen and another cut out sentiment.


I covered the back of all of these pages with a solid color paint, and on the advice of my five year old daughter, have decided to add some writing eventually to each page. I hope you enjoyed, have a great week!

Tuesday, February 18, 2014

Gear Love plus my Texture Tip for This Month!

Good morning! Today I am sharing with you a project I have created using several items from this month's sponsor, Sin City Stamps.

To begin, I covered one of the large wooden panels with a cool gear themed edge with gesso and let it dry. Then, I used some red acrylic ink to lightly paint the background. A light dusting of Tim Holtz Distress Glitter in pink was also added while the ink was still wet.


Next, I used the Pan Pastels from the kit and worked them into the background, as well as added some color to several of the gear themed die cuts. I also covered one of their chipboard keys with gold Stickles for some sparkle :)


For the final touch on the background, I used the large gear laser cut page as a stencil and sprayed some Dylusions spray ink in Postbox Red.


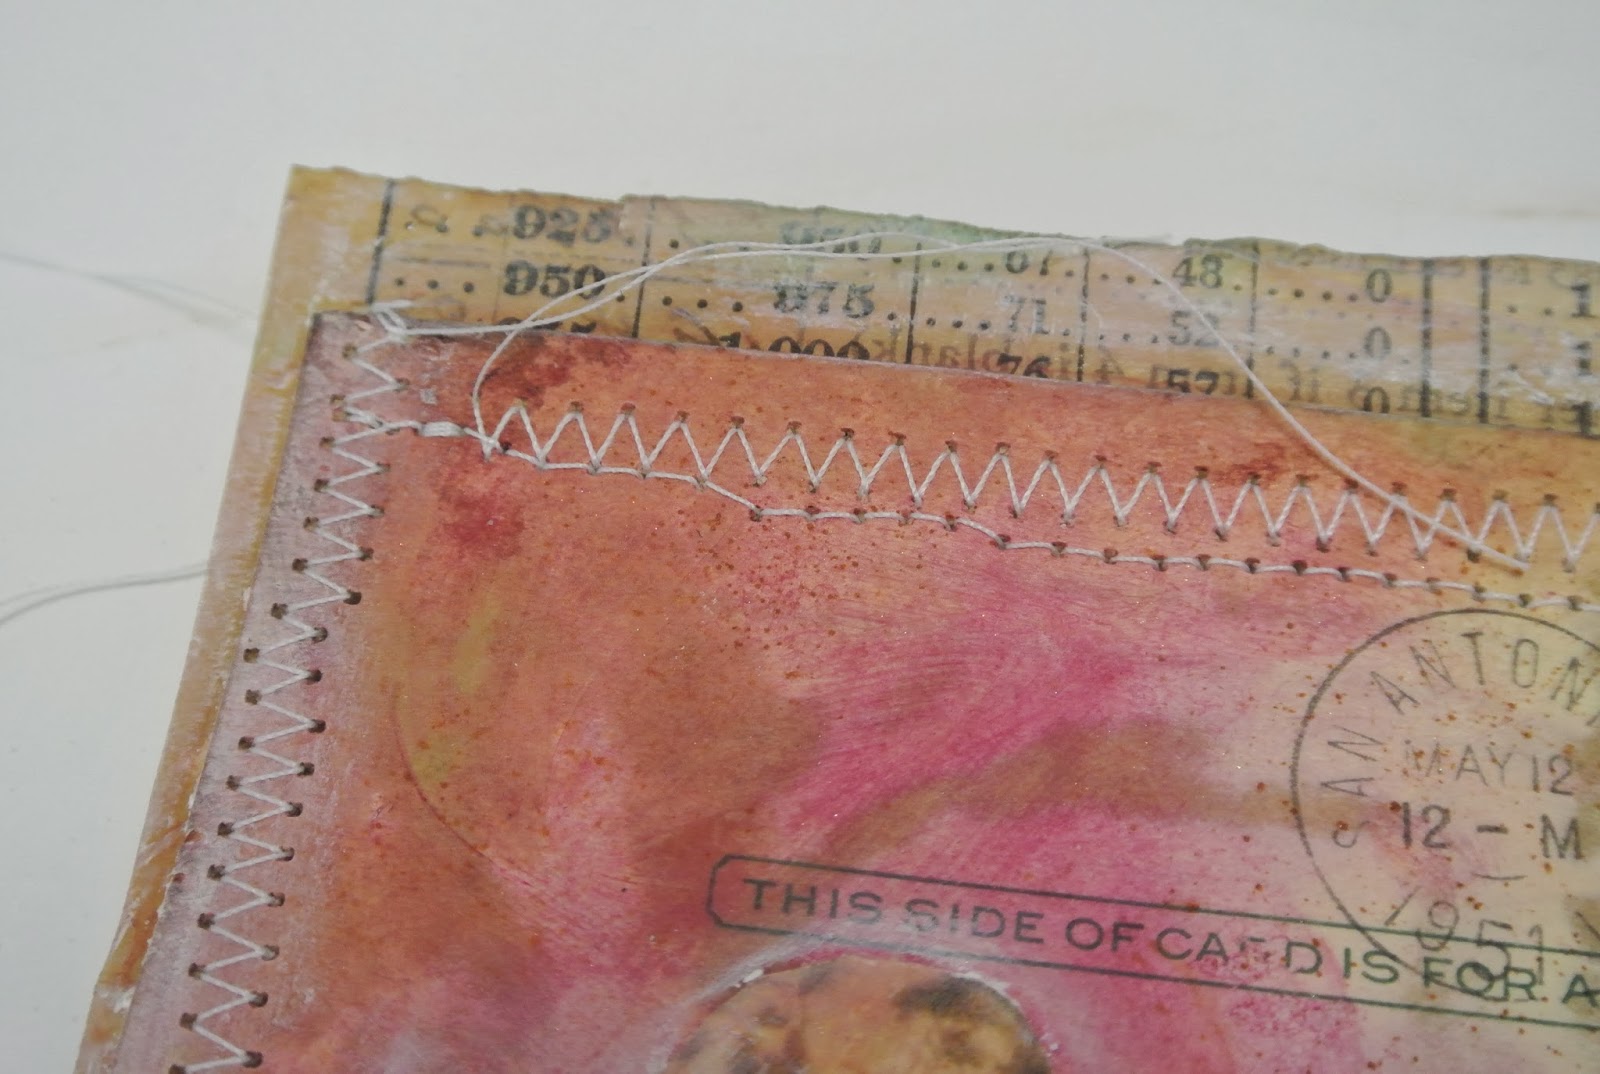
A few weeks ago, I covered several pieces of vintage papers with clear resin from Amazing Crafting Products. TEXTURE TIP: I love the clear resin on vintage paper, especially the older thin papers. It adds a transparent quality that is really interesting. I decided to use some of these in this project, along with some clip art from the Frog Dog kit. I blended in some of the Pan Pastels to add some color, then collaged the pieces together and added some stitching around the edges.


On the collage I also used one of the Sin City Stamps and some Versamark ink. Then I used Lindy's embossing powder to bring out the design and add a smooth texture.


I followed up by edging all of the pieces with the Gelatos from the kit to give it an even more distressed look. Then I adhered the mini collage to the large board and added several of the wooden gear pieces and the cutouts that I had colored before with the Pan Pastels. I added a piece of rosette trim that I found in my stash, one of the stick pins from the kit, and a few other little bits from my stash to complete the project. Here is the final result:


And a few close ups:

Thursday, February 13, 2014

Frog Dog Teams with Sin City Stamps : A Letter Journal to my Daughter


Hello fellow mixed media lovers, I am up today with a project highlighting both our 


Sometimes I  create for the sake of creating...it's an outlet, relaxing and satisfying...but often, I try to create projects that are lasting and with specific purpose...this project is the latter.

A Letter Journal to my Daughter:)


I started with this great Butterfly Mini Chipboard Journal from Sin City Stamps.  It came with 2 pieces of chipboard and several white pages (sturdy mixed media paper)  to go inside.

I covered the front and back of my journal (chipboard pieces) with black gesso, to allow a nice contrast for the Pan Pastels I would add.


I "inked up" the large Butterfly stamp from the set with Versa Ink from our kit, and pressed it onto the front piece.  Next, I used a small sponge applicator (our kit came with some of these) to brush on the Pan Pastel color.  I actually blended a white and blue to achieve a slightly lighter shade.

Below, you can see how you can blend colors right in the "pots", and when you are finished, simply wipe the colors with a clean applicator and your color is back to it's true shade. 

*To clean applicator simply rub a few times across a paper towel.  You will see the color stop coming off the applicator, and then you know its clean)


Above, you can see where I added more color on top for a bit of contrast.
I actually used a small dry paint brush for this, wiping the brush on a paper towel in between colors.

When you are finished adding color with the Pan Pastels, you can "set" the color with water, a fixative spray or even hairspray, to prevent the "chalk" from rubbing off.

Next I added some detail with a uni-ball signo pen in white. (flowers, butterflies, and sentiment)


AND...I used the Faber Castell White Gelato from our kit, to accent the journal's outside edges.


In order to make this piece more beautiful and durable, I added Amazing Clear Cast Resin.

Follow the products simple directions.  (Mix part A & B, stir and pour!)


I used a very small amount (about 1 tsp. of each part A & B) careful to stop slightly short of the very edge to prevent the Resin from flowing off the piece.

I used an old clean paint brush to spread the resin across the butterfly. After I was finished, I rinsed the brush in warm soapy water and in the morning my brush was good as new:)

I let the piece set overnight. 

I created the pages inside just like I did the cover. (minus the resin)


Versa mark, Stamp, Pan Pastel.


I blended the blue with a bit of white for a lighter shade like I did with the cover.


Once I created the background color, I wrote the "letter to my daughter" using a Scarlet Lime pen.


I added an extra large jump ring to hold the journal together, then added a charm, a key, 
and a few pieces of ribbon.


I just love this Butterfly Stamp set and Chipboard Journal from Sin City!  
They were perfect for this project.  

The sentiment around the front cover is one that is very special to me...

"Wired into a creature who looks nothing like a Butterfly, 
is the complete identity of a Butterfly!"

(just like the lack luster caterpillar whose true identity is the miraculous Butterfly...so are we created for so much more!)

If you are interested, I share the letter on my blog:)  It is personal to me, but contains general sentiments that are meaningful for "any daughter."

Hope you are inspired to create your own Letter Journal using some of these great products:


As always, it is a joy to share with you!

Sue


Friday, February 7, 2014

Postcards, with love:)


Happy February!  I love Valentines Day...even more now, because my Granddaughter was born on Feb. 14th, and she is such a love.  I wanted to create some Valentines Day postcards, and decided I wouldn't stop with the holiday cards, but would make some everyday postcards as well.

I tend to have cards stashed everywhere and often forget where I've put them, so I wanted a cute tin to keep them clean and organized so below you will see several projects in one.

All projects below made possible by Frog Dog Studios, Amazing Crafting Products, 

I started with a cute Christmas gift tag tin...using Heavy Gesso (from our Jan. kit)
to cover the old label.


Next, I used my new favorite stamp set from Sin City Stamps...I LOVE the cool detail in each butterfly, they lend such a vintage/feminine feel...I especially love the large size:)


1.) "Ink up" the Sin City butterfly stamps with the Versa Mark pad that came in our kit.
2.) Press each stamp onto a piece of white tissue paper
3.) Load up the sponge applicator from our kit (specially designed for Pan Pastels) with pastel.
4.) Carefully "brush" on color over the Versa Mark stamped images.


I think these stamps are so beautiful! 

I carefully cut them all out. Then applied them to the tin using Matte medium.

This may seem tedious, but some of the mindless work involved is a "no brainer" (haha) cause I listen to audio books when I create:)  

Anyone else do this? 

I confess to you right now....I listen to YA...pretty often:)


Using a fabric glue, I glued simple brown twine around the border and then used the Pan Pastel  to make it pink:)


I decided I wanted a little more texture and depth, so I repeated the steps used with the tissue paper on a thicker water color paper, and then cut them out, gluing them onto the tin with Mod Podge. 

In the above picture I am showing the stamp I used to add more interest
Brilliance Stamp Pad. (white)


A few more details were added and finished off with a thin metal wire tied around the stamped image "love letters."


I added the twine border to the tin in order to provide a "wall" for the resin I would finish the project with.  All of the elements that were added would be sealed beneath the hard surface of the clear resin, making it lasting and durable.

If you didn't know, Frog Dog Studios & Amazing Crafting Products have partnered 
in creating fun projects for you to be inspired by! 

Amazing Clear Cast Resin is sooooooo easy to work with and is really versatile...

Initially, I had hoped the twine would provide enough of a wall to "hold in" the resin, but silly me...the twine is porous, so although it kept the bulk of the resin inside it's walls, it soaked into the twine giving it a glossy appearance.  

It doesn't take much resin for something like this.  Simply follow the directions on the 
Amazing Clear Cast box 
(Mix part A & B, stir and pour)

It will take a good 24 hours to dry...but when it does, you will have a clear finish that is hard and durable, and seals in all your lovely embellishments!


If you try this project and don't like that look, using a paper pen for the border works very well.  I used a paper pen for the iphone case I did below.


Now for the CARDS that would be stored inside the tin:)

1.) Apply gesso to any paper you'd like to use.  (I used 12 x 12 white card stock)
*you do not have to use gesso when using Pan Pastels, but with the process below it is needed to achieve the same effect.


2.) "Rub" Pan Pastels over the dried gesso.  You can use all varieties of sponge applicators.  (even drug store make-up sponges) You can also use a dry brush.  Above, I actually used a Magic Eraser:)  I had one on hand and because of it's size, I found it easier to apply across a larger area.


3.)  Use a stencil (I'm using a 12 X 12 stencil )and wipe off color using a baby wipe (I keep them on my work space at all times) 


Above is an example of the sheet I did using both the Magenta & Permanent Green Pan Pastels.

4.) Cut to desired size and "mount" on another piece of plain white card stock, allowing a small border on the front of the card. (SEE BELOW FOR STANDARD POSTCARD MEASUREMENTS)

5.) Using a variety of stamps, add detail. (I used a Scarlet Lime pen to add the border and sentiment)


The butterfly was done by applying the Versa Mark to the Sin City Butterfly stamp, then adding white embossing powder. (by Zing)


* NOTE 
When working with Pan Pastels, I often use a fixative.  

Fixative can be used as a way to isolate previous layers of color when working with pastels, 

especially on less toothy surfaces. It is also used to "seal" your work...

pastels "unsealed" can rub of a bit.  You can even use an aerosol hairspray as a fixative!


ALL OF MY CARDS WERE SPRAYED WITH ACRYLIC SEALER TO CREATE A DURABLE "POSTCARD LIKE" SURFACE.


The next group of cards were made as follows:

1.) Cut white card stock to desired postcard size.

FYI:) According to the Postal Service, you may think that your mail piece is a "postcard," because it is a single sheet of paper...But, to qualify for mailing at the First-Class Mail postcard price, it must be:
Rectangular & at least 3-1/2 X 5 inches and no more than 4-1/4 X 6 inches.

Good to know:)

For the cards below, I cut to about 3 1/2 X 5 1/2, because I was going to add a border.

2.) Write sentiment with black Gelato.

If you have not tried Gelatos, I am here to say that they are one of my favorite mixed media tools!  I was very excited to use them this month!!!


You can leave the Gelato applied as is, or you can add water, using a brush to spread the color how ever you like.  You can also "smear" them with your finger (without water).  I often use smeared gelatos on the edges of my canvas pieces.

 All techniques can be used on one project to achieve a great layered look. 


3.) I used a wet brush to spread the gelato a bit.  
4.) Using the applicator in our kit, I spread both Pan Pastel colors onto my card.  
The wedge shaped applicator was perfect for getting into the tight spaces.

5.) Using a stencil as a guide, "dot" gelato in each space and then rub with your finger to extend the color to fill in the whole space.


6.) Outline the dots and word with both a white and black pen.  
(Uni-ball signo (white) & Scarlet Lime (black) )


7.) Glue onto old book page.  (I actually used my tape gun) then cut out leaving about 1/4 inch border. 


8.) Tape or glue the finished card fronts onto another piece of white card stock and then cut out.
(this gives your postcard more weight, and a nice clean side for the back.)


For the Valentines Day cards...


1.) draw a heart shape that fits the size of your post card.  (if you have a cookie cutter, you could use it to trace, or maybe a stamp you already have in your stash)

My heart extends a bit beyond my card.

2.) Tear the wonderful sheet of ephemera from our kit into pieces and adhere to the heart using glue or Matte medium.

3.) I used a brown Pan Pastel I already had to add an aging effect, by rubbing it on with the sponge applicators. You could use distress stain if you have that:)

In the picture above, the heart on the left is before aging, the right after.

The photos below show the process I used to create the background for the 
Valentines Day Cards using a Gelli Plate.


The Sin City stamp used above is from our Feb. Kit!


After stamping or using the stencil to create a pattern in the paint, remove stencil and stamp and press a clean piece of white card stock onto the Gelli plate. (see above)

Then cut out your postcards.


Above, I am applying the Magenta Pan Pastel to the dry card I created using the Gelli Plate.
I did the same application to the cards below.


To finish the Valentines Day cards, I stamped letters onto old book pages and 
cut out for the sentiments.


The white sentiment stamped on the card above is also in our kit.  (Sin City Stamps.)


At home in their new tin:)

Our monthly kits are so jammed packed with product that you can create projects for months!!
Once you purchase just a few, your mixed media supply will blow your mind.

I know that I'm not alone when I say that we LOVE to see what you all create using these great kits!

Please post your projects on our FB page!!!

It's a joy to share with you:)

Sue