

...Continuing to enjoy our Fantastic February kit, this is Sue, up to share another kit inspired project!

The main focus of this project is the Faber-Castell Mixed Media Journal below...
Along with a few other great kit products.

The journal kit comes with 6 pages. Tina used all her chipboard pages as actual pages
for her awesome journal project. (check it out here.)
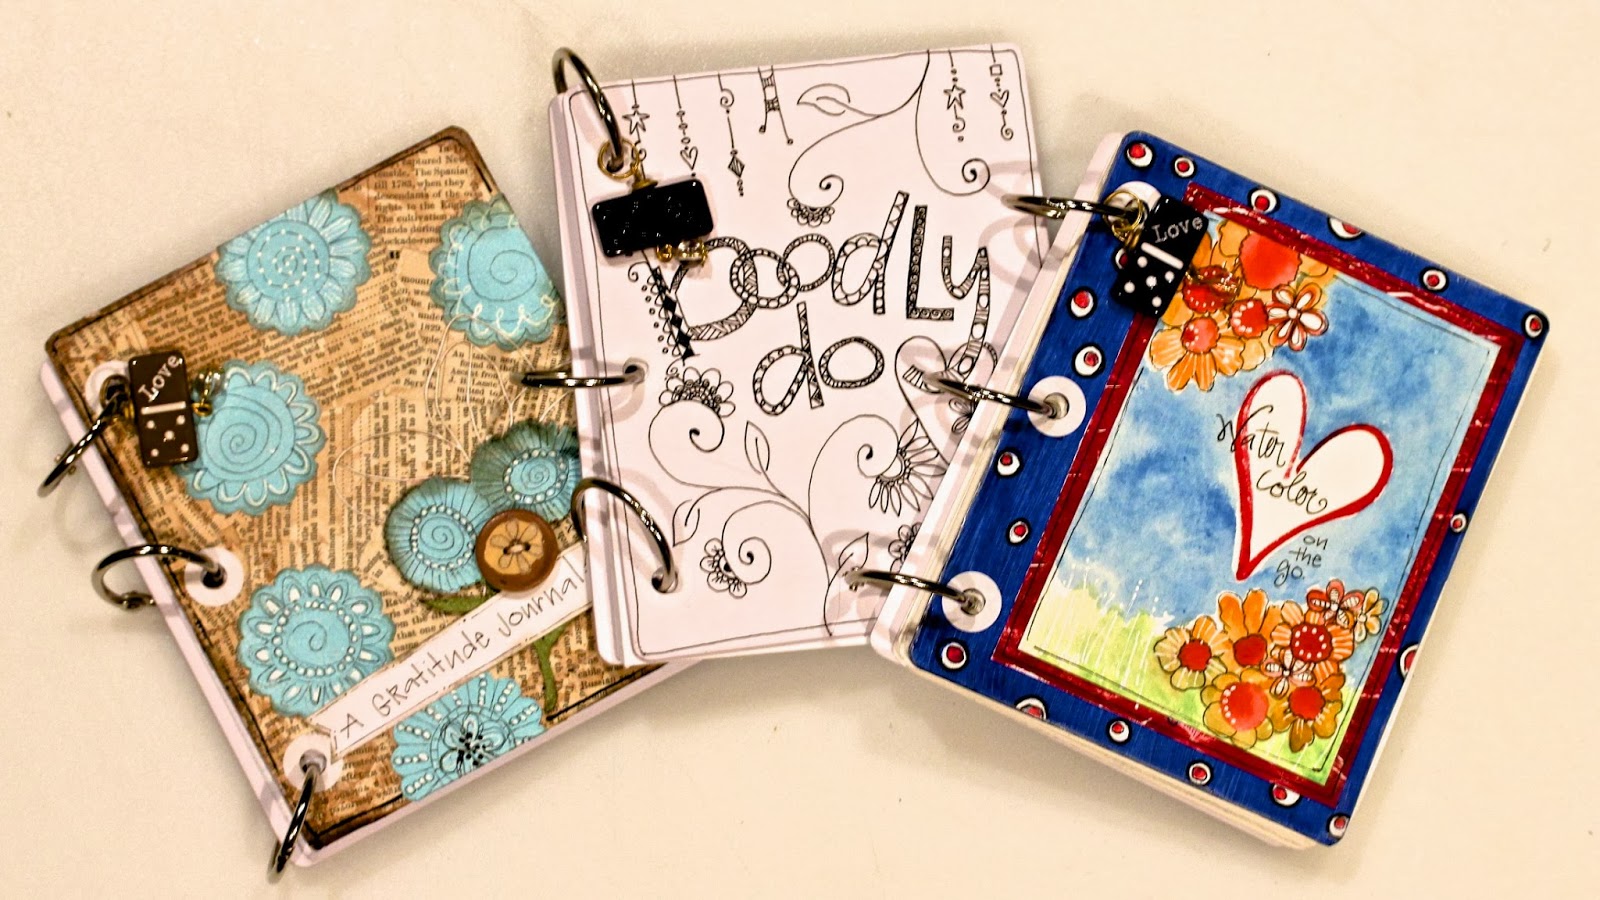
I decided to make 3 different journals, filling each of the 2 chipboard covers with different papers.
so....I needed to cut my inside pages to fit my covers. (well, slightly smaller, so they wouldn't stick out)
BUT...
I HATE numbers....I HATE to measure...I have NO left brain...only RIGHT...
so....
instead of MEASURING the chipboard like most "normal" people, I just traced mine onto 140 lb. water color paper for the pages of the
"Watercolor to Go" Journal.
I cut a smidge inside each line I drew:) see....no measuring. (unless you count a smidge)

I was able to fit 6 on each page of watercolor paper, so I decided to cut out 24.
For the "Gratitude Journal" I decided to use Gridded paper, well, cause I had a whole pad of it & I liked the color of the grids...BUT, it's pretty thin stuff, so I FORCED myself to measure and cut out the inside pages with a paper cutter, cutting several pages at once. (about 4 1/4 X 5 1/4 inches)

For the Doodle Journal, I did the same with white card stock.
Once I had all my Journal pages cut out, I put each journal together by punching holes in all the pages to line up with the covers. It's easy when you use a Crop-o-dile...its "chomps" through a whole stack of paper like butter.

I had lots of confetti.
SO, now for the covers of each journal.
I sketched a heart near the center of one of the watercolor pages with a pencil and then went over it with a Pitt multi-liner pen, erasing the pencil after I outlined. (Pitt's are waterproof and permanent)
Next, I spread bits of color in the top left and bottom right corners, where I knew I would be "defining" flowers later. I added green at the bottom and filled in the rest of the white spaces with blue.


Once dry, I used both a black Pitt multi-liner and a Uni-ball Signo in white to add details to the flowers, "grass", & heart.


I decided to Paint the Chipboard covers a blue that would be compatible to both the water color and the cute dark blue domino charm from our kit. (It's hard to see it's true color in the photo, but it is a dark true blue)
I added a Gelli Plate Background scrap in red, (from my postcard project here.) behind the watercolor page to pull out the red in the flowers and heart... and then drew white dots filled in with red and outlined in black.
The "hole reinforcers gave it a little more "finish" along with the white Gelato from our kit rubbed into the edges of the cover.
The Gratitude Journal is up next.
I wasn't sure what I wanted on the front, but began by punching out some shapes.
I decided I liked the "scalloped circle" and went with those as flowers.

Next I covered the white chip board cover with torn old book pages using matte medium.


Once that was done, I decided to add some color to the "flower." I knew I wanted to incorporate blue, because the grid paper inside would be blue.

Using the Versa Mark from our kit, I covered the flower, then sprinkled embossing powder over it to coat...then used a heat tool to set.
Below, you can see the Neocolor II crayon I used to add a "brown stain" to the whole cover.
I used a very wet brush, loading it with color by brushing the end of the crayon.


Above you can see the detail I added to the flower centers using the Pitt pen and Uni-ball Signo mentioned above. I also added some brown ink from a stamp pad, applied with a make-up applicator, to the edges of the flowers and journal cover.
I drew the green leaves and stalk on card stock, applied green embossing powder, and then cut them out. The flower above sits on top of a super cool wood cut out from Sin City Stamps.

I used an awl to pierce a few holes where I
wanted the cute button from our kit to go.

I went with browns to go with the cute brown domino that came in our kit!


Lastly, I made the cover for the Doodle Journal.
I started by writing Doodly do in the center of the cover page.


Simply "outline" the letters, stopping where they meet another and decide which goes in front, which goes behind. After your done outlining, erase the pencil lines.

The rest of the "doodles" were also done first in pencil, then over again with a Pitt multi-liner. (xs)
As always,
It's a joy to share with you!
Sue


