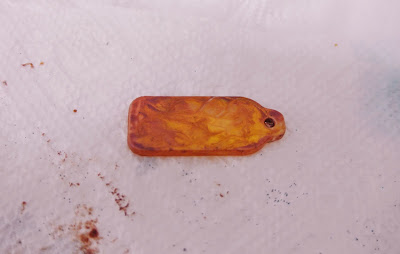
To begin, I selected several of the Tim Holtz Fragments from the kit to work with. I covered this first one with some matte medium and the Alumidust powder. I swirled it around in the medium, adding in some of the gold ink from the kit. I used the end of a paintbrush to create the swirl texture, then set it aside to dry. I also added a word and a piece of scrap paper from my collage drawer.
I continued in this manner, using different bits of collage pieces from my stash and from previous kits (love that tissue paper from an older kit!)
When these were dry, I did some light stamping just to add some texture to the background and create a distressed look. The stamp I used had sheet music. Be sure to use StayZ On type ink if you do this. You don't want it to smear everywhere when you move on to the next step. I also went around the edges with some more of the gold ink from the kit.
Next, I mixed up a batch of Amazing Clear Cast Resin and added some Alumilite Metallic Gold powder. Then, using an old small brush, I very lightly coated each piece with the resin. The gold powder gave each piece a really cool aged look and made them all look like a set, even though I used different collage elements for each one. Make sure when you are working with the resin to work on top of a white plastic garbage bag. The resin won't stick to it, so if you over pour or spill a little it won't stick. Plus it makes for easy clean up! I use a paper plate under my trash bag so I can move my project around if I need to.
After allowing the pieces overnight, they were ready for the finishing touches. I found these wire stemware hoops at Hobby Lobby. They were pretty cheap. I also had some larger beads leftover from my Titanic Inspired Tin project. I'm not sure what I was thinking at first, but I just put the beads and the fragments right onto the stemware hoop. Then I realized that the fragment wouldn't lay flat (duh) so I went back and attached a jump ring to the fragment, then attached the fragment to the hoop. It worked perfect and now lays completely flat. Of course this was done after I had already taken my final pics so you won't see the jump rings in the pictures below.


I love these!!! Melissa, you are so creative:)
ReplyDeleteAww, thanks Sue!! :)
Deleteoh! these are so pretty, they would make such a cool little gift for someone .... I see that wine looks chilled to perfection too :o)
ReplyDeleteThanks, Annie! My mom came to visit me soon after and I slipped one on her wine glass, she loved it and now wants a set of her own! :) PS--yes, the wine was perfectly chilled. I treated myself to the glass when I was done taking the pics!
DeleteThanks for sharing this idea-I need to make a small, mailable gift for someone who happens to be in the wine-tour business, and something like this will be perfect to make!
ReplyDeleteThanks, Lynne. I'm glad you liked them!! I'd love to see what you come up with!
DeleteThese are soooo cool - thanks for the inspiration! I will need to make some and "jack" your idea :)
ReplyDelete