

I am having so much fun participating in a journal swap with a group of very talented artists!
It was organized just as I received my March kit, and I DEFINITELY
wanted to use some of these fun new products!!

I used the products above, along with Lindy's Magicals
in the same Starburst shades that came in our March Limited Edition Kit.
Both sets are called "Industrial Chic"


...and can be used interchangeably.
My first decision was to use a favorite "trinket" I purchased at a local design store.
(It was the only cool thing I could afford at the time!)

Above is a photo of the purchased item, and next to it, the reproduction made with
Amazing Crafting Products!
To make the mold...

TIP: To decide how much putty to use, start by using just one part (A or B) pressing it onto your piece to see how much it takes to cover, using enough to have a solid bottom...if it's too thin on the bottom it won't be sturdy. If I can almost thinly cover with one "side" (a or b)
Then add the equal amount of the other side...mixing until incorporated.
(1 min to mix, 1 min to mold)
Make sense?
Using equal parts A & B of Amazing Mold Putty, I pressed the putty over the top of the piece, then flipped it over to build up the sides.

Leave for about 10 minutes, and then your mold is ready!


I mixed up my Amazing Casting Resin (1 part A 1 part B) and added a few drops of
Alumilite Brown Dye. (If I didn't add the dye, the cast would be white)
Wait 10-15 min. and your cast is done!
Once the cast was ready, I applied a little Super Heavy Gesso (from a previous kit)
to the center of the heart.
I did this, because I wanted to give the center a slight red cast, and without the light coat of gesso, another color would not show up on the dark brown base.

Above, see the rough edges? It was easy to trim these with scissors! Yet, it looks like metal!
Next, I added some barn red distress stain. A bit of trial an error here...I'll know what I'm looking for when I see it! (later, I added some rusting powder)

Next, I covered my journal front cover with a collage of "ephemera" from our
Tim Holtz Salvage Stickers.
Tim Holtz Salvage Stickers.

Then I randomly "spritzed" and rubbed on the Lindy's Starburst Spray in Moon Shadow Mist.
It has this wonderful blend of shimmer, brown, and a hint of gold & silver.
I knew I wanted to add some chain I had in my stash to the piece that I cast.
I wrapped the chain around it, before I loaded the mod podge on to the back, in order to adhere it to the front of the journal. This journal is going to be traveling, so I wanted it to stay on!

I added a few metal pieces I had on hand to the chain, along with the piece of metal screen with the word Grateful...the theme of my journal. (glued on with mod podge)
(Below)
In the top left hand corner I added the clock sticker (from the Salvage collection) and the Tim Holtz spinner. (also from our March kit) The almost rectangular piece under the spinner is actually a piece of mica, a layered mineral used to make Lindy's Stamp Gang products!
Also added..a bit of doodling at the binder's edge, and a few "postage" stamps applied at random.

As you can see above, I added a generous sprinkling of Dusty Attic's Rusting Powder.
*along with the red I had previously added to the heart's center...the rust gives it just the color I was after! yay!
I think we (the design team members) are all out of this wonderous dust and are begging Tina for more!
I've used it on every one of my projects this month!
To use the rusting powder:
1.) Apply liquid glue (craft glue, matte medium, mod podge, or even embossing liquid) to the areas you want to rust.
2.) Sprinkle rusting powder over those areas, tapping off excess onto a piece of paper.
3.) Pour excess back into jar (you'll want to save every bit of this super cool product!!)
3.) Spray with a white vinegar.
4.) Let it dry for at least 30-60 min. Rust deepens with time.
For the finishing touch...a few ribbons:)
A peak at the inside...

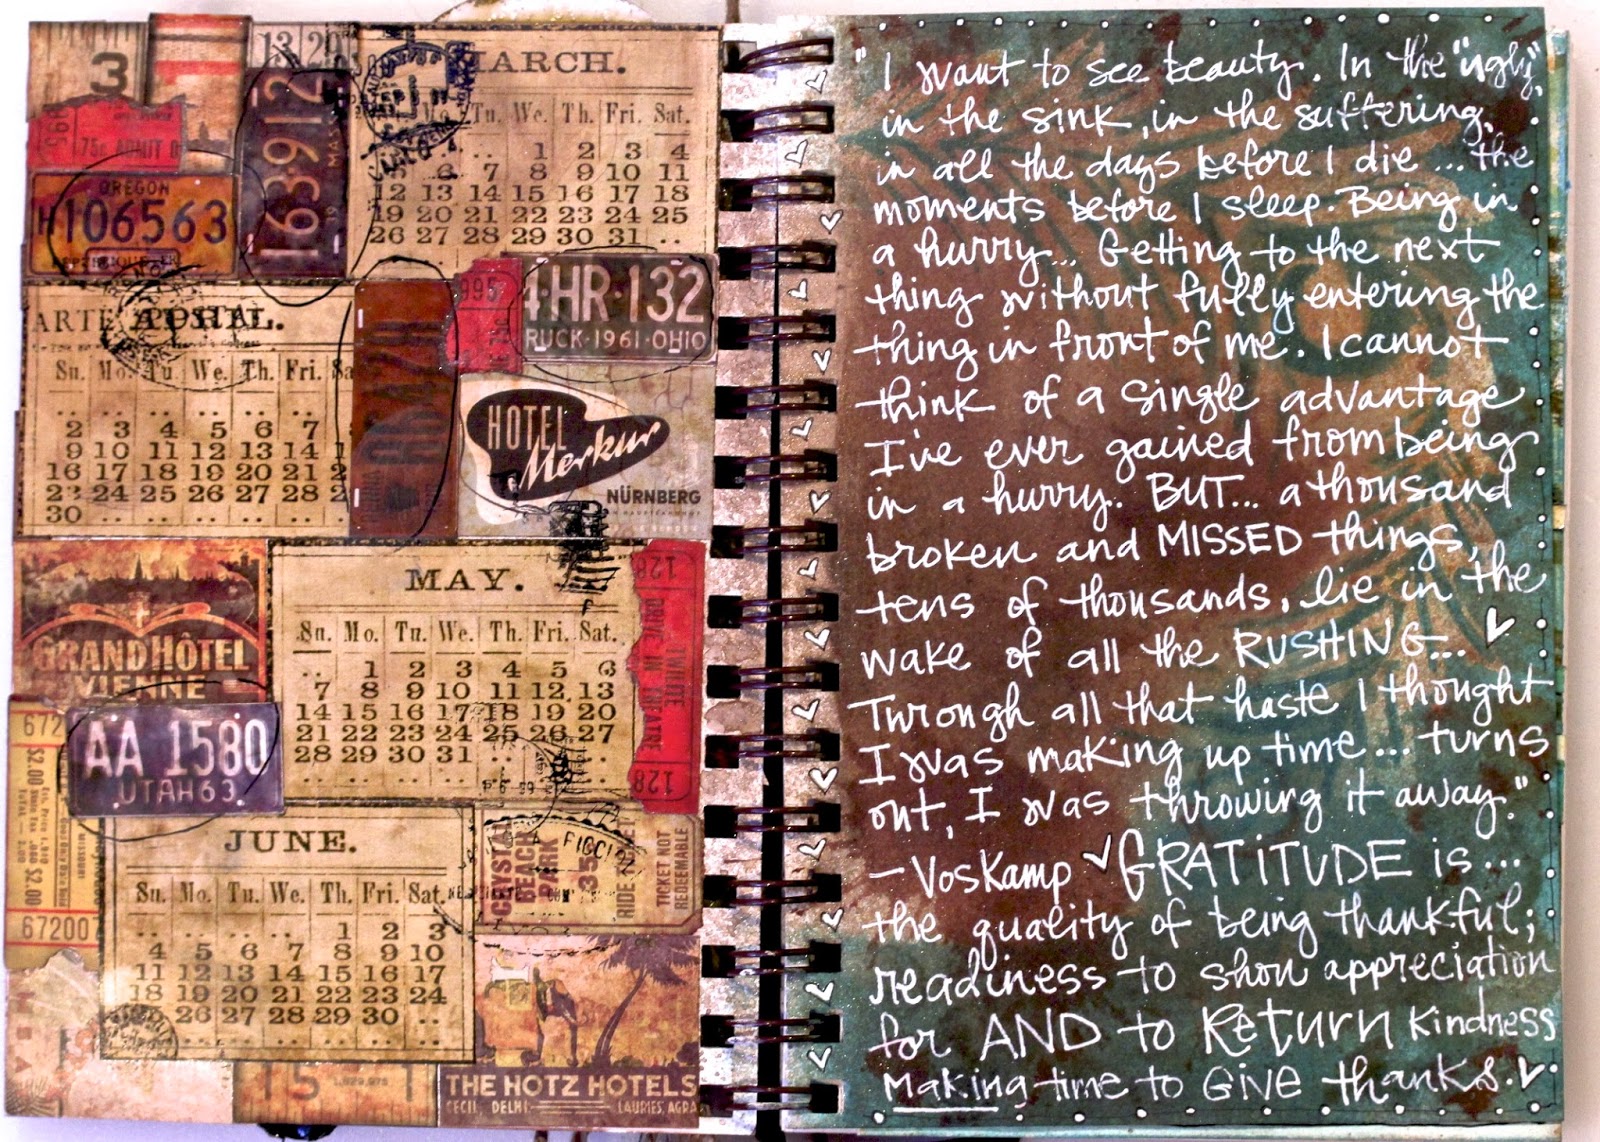
Look more Salvage stickers!!! There are tons!!
More Lindy's and Rust Powder below.


Hope you feel inspired by all of these wonderful products!
Go create!!
It's a joy sharing with you!
sue

this is really gorgeous! I love how you made the embellishment using Amazing craft products... Truly amazing! :)
ReplyDeleteThis comment has been removed by the author.
ReplyDeleteOh my goodness, I REALLY LOVE what you did with all that yumminess! So much inspiration! Thanks for sharing!
ReplyDeleteTHanks so much for your kind words Felicia! This months kit had sooooo many cool products:) Have you used any of them?
DeleteSue - this is another AMAZING project! Next round of the Journal Swap... I will be certain to join :)
ReplyDeleteSusan, I know you are super busy, so I am very appreciative of your encouragement! Would LOVE to Journal swap with you!!!
DeleteThis comment has been removed by the author.
ReplyDeleteThis comment has been removed by the author.
ReplyDeleteLOVE, LOVE, LOVE this!!!!!!! Outstanding the way that piece looks so old, vintage and rusty. Fantastic tutorial on how this was done!!! I feel a shopping spree coming on. :)
ReplyDelete