It's hard to believe we are fast approaching 2014!
It has been such a wonderful experience to be a part of such a talented bunch of artists here at Frog Dog Studios. As we come to the end of December, I am posting my last 2013 project.
A Christmas Banner...using fabric, stick on canvas from our fabulous December kit, and a simple lettering technique.
It never ceases to amaze me how many projects I can create using just one monthly
Frog Dog Studio Kit!!
Over the summer, Melissa inspired me with the beautiful Gelli Plate Banner she made for her laundry room. (check it out here.)
SO, when I opened my December Kit and found it contained Sticky Back Canvas, I was thrilled!
(Duro, 6 X 6 Stick On Canvas Pack)
I had already purchased a few half yards of pretty Christmas Fabric, anticipating a few December projects:)
The first step was to draw my pennant patterns.
I used this formula:
NOTE: This is the process I used, but my RECTANGLE was smaller and measured 6 inches tall, by 5 inches wide.
...marking at the half would be at 2 1/2".
I drew the 6" tall triangle (largest) on a piece of card stock and cut it out.
The largest triangle would be cut out of the fabric. The smaller triangle would be cut from the sticky back canvas. I literally traced the large card stock triangle onto another piece of card stock, and then "eyeballed" it to cut about 1/2" smaller all the way around.
I traced the large triangle with a white fabric pencil and then cut each one out with pinking shears.
I cut TWO for each letter (16 total) to later be sewn together. This would give the banner a more finished look and gave each pennant more "body."
*NOTE: If I do this again, I would make one more pennant with no letter, to separate the words "Adore & Him."
(people keep reading it as one word...meh!)
The next steps were to trace and cut the canvas & paint each one with several coats of chalkboard paint.
I used 8 triangles. (A-D-O-R-E-H-I-M)
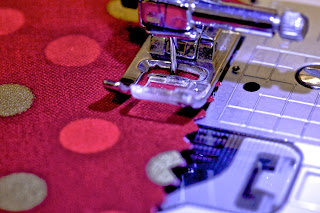
Using black thread, I stitched 2 pennants together (wrong sides together) which also added a nice border. In the photo above, you can see that I lined up the presser foot to the edge as I stitched.
Once those were done, I added the letters to the painted canvas using my favorite
uni-ball signo pen in white.
Start with a simple letter.
Thicken it, and leave a rectangle of space black.
Add a few horizontal lines.
Then add a few "shadow" lines for more character.
NOTE: to assure the lettering will remain without smudging, spray before attaching to fabric with a clear matte acrylic sealer.
Once the letters were finished, I peeled off the sticky back, and stuck them in the
center of each sewn pennant.
Next, I stitched the canvas on keeping the needle very close to the edge of the
canvas all the way around. You could omit this step to save time. The canvas will stick without the thread, but I like the extra "finish."
Because the canvas has a sticky back, the needle needed to be wiped occasionally (I used a baby wipe) to take off the build up of glue.
Iron your ribbon in half, steaming a good crease.
Lay it down on a long counter and place each finished letter in the crease,
careful to maintain an even spacing.
Place the ends close to each other.
Carefully pin them in place, and then stitch along bottom edge of the ribbon keeping the needle very close to the edge.
I made sure I cut my ribbon after I was sure of the spacing in order to allow for ample "ends" for tying the finished banner.
Thank you for stopping by!
It is such a joy to share with you:)
I look forward to a new year at Frog Dog Studios!
Merry Christmas to you and your family!
Sue


No comments:
Post a Comment