

Good Morning Frog Doggers:) It's my turn to reveal my monthly series called
Letter It!
I have had a "romance" with fonts that started at the young age of 7, when I was assigned the task of making posters and banners for my twin brother's football team. I can remember spending hours making the signs that would cover the "hoop" the team would run through in a matter of seconds. I haven't stopped lettering since...I confess, I have lately been dreaming of fonts:)
BY THE WAY...Check out Kevin and Amanda for the most adorable free downloadable fonts!
Each month, I would like to share some of the process of shaping and "embellishing" letters that have helped me over the years, and I'd like to share creative ways to enhance many projects with the "written" word. You can do this!
No matter what kind of penmanship you think you have!
I want to help you develop your own style.
Today's Letter Lesson
starts with a Journal Page using a few treasures from our AWESOME August Kit.

FIRST, a little "Background" on the Background made with the addictive Gelli Plate.

I used Distress Paint (Broken China) with a spritz of water...spread out on the Gelli Plate with a Brayer.
I had this roll of Christmas "ribbon"found in a sale bin at Michael's, so I cut it up and laid it on top of the Gelli Plate with paint, lightly pressing it into the paint with my hands. I pulled the ribbon back off and then pressed a piece of white card stock on top of the plate. I really like the way Distress paints naturally move and "separate" on the Gelli Plate...The Distress Paints make cool patterns without having to use anything else...although the ribbon below did add a cool effect.

With my fingers, I added a little bit of Gesso to the page, just to give it a softer look.
For the "pretty girl" I pulled out a page from my vintage music book and added a thin layer of Gesso.

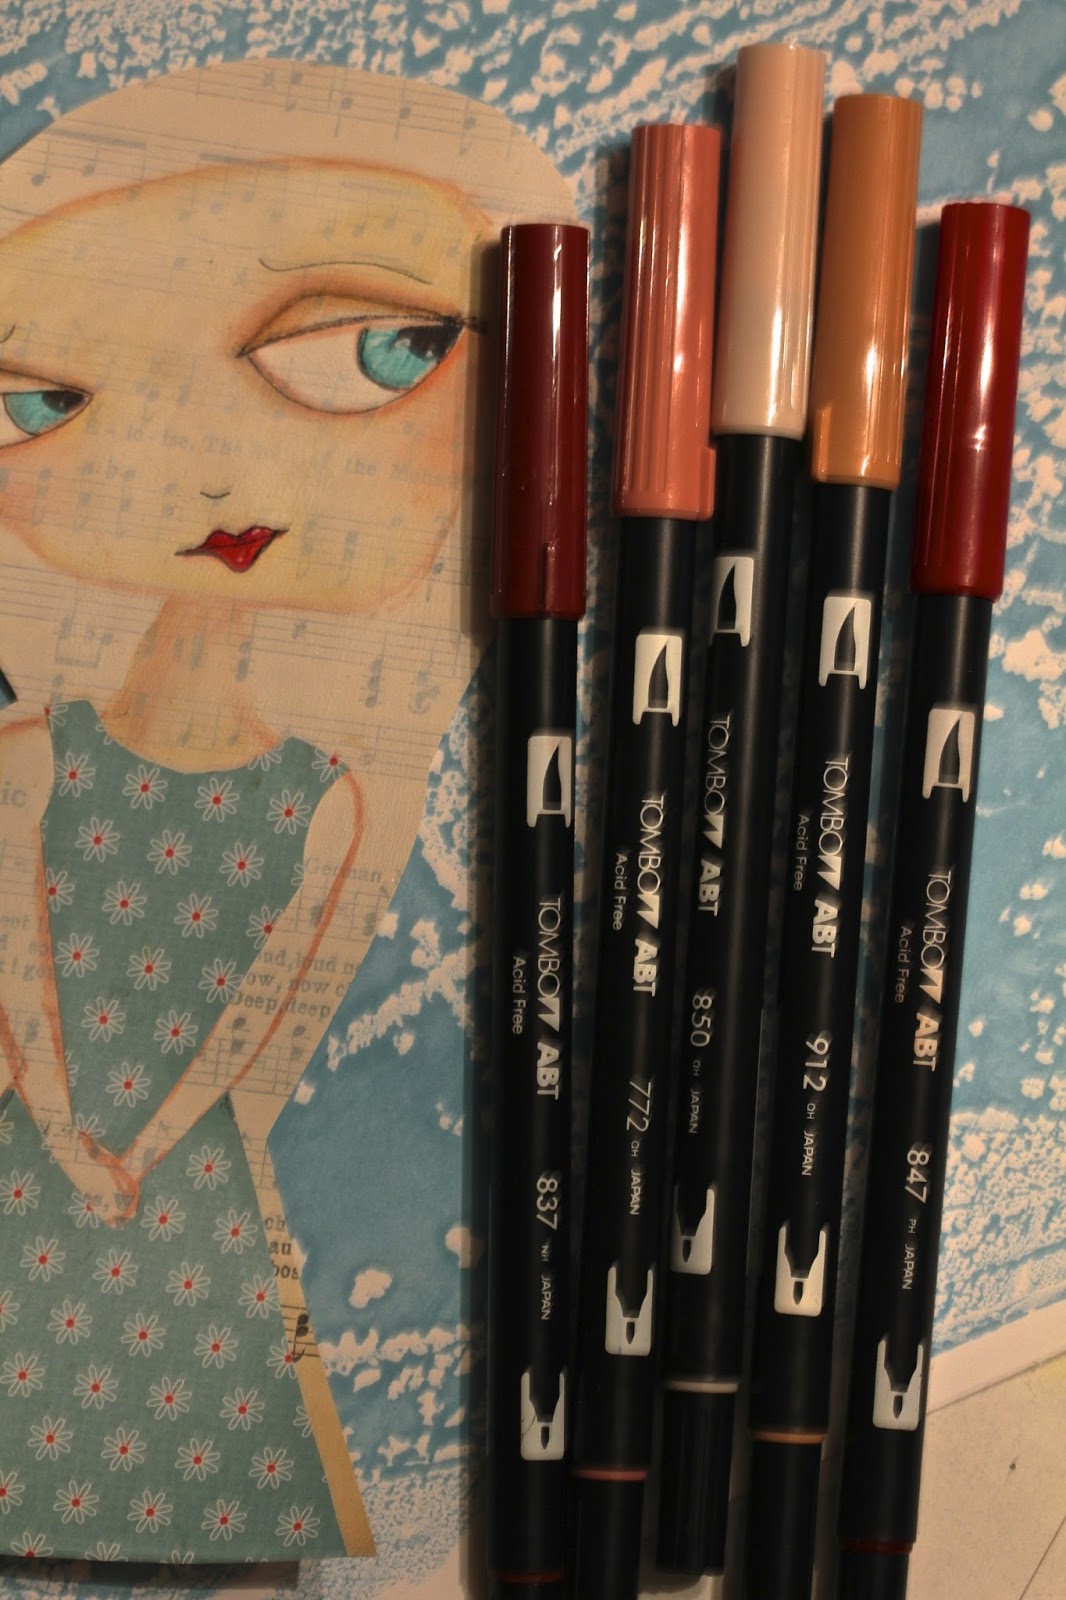
Next, I drew the girl using a Tombow in the lightest shade you see below. (I didn't want to have to erase pencil lines today, but often I use a pencil first and then erase-the eraser is your friend)
I used the shades you see below.
Next, I cut her out leaving a little excess page all the way around. With a piece of tracing paper on top of her, I drew the shape for the hair and dress and then cut out the pieces to use as a template for the scrapbook paper forms.

I traced the pattern on the back of the printed paper so I could see my pencil lines. (Make sure you turn your TRACING PAPER template over on it's back side before you trace... because you are tracing it onto the BACK SIDE of the PRINTED SCRAPBOOK PAPER it will end up in reverse if you don't *I didn't take a picture of the one I did WRONG! haha )
I colored the Black and White paper with my Brown Tombow marker for her hair.
Once I had her glued into place with Studio Multi Medium Matte, I added a bit of outlining with a black Micron Pen. (.01)
Then my page was ready to be "lettered." I chose a Sentiment and decided to do 2 of the words with an "embellished" Capitol.
The letters are W & L.

If you look at the example above, the letter W starts out simply written...not fancy or tricky:) I used my favorite Mixed Media Pen Scarlet Lime, but you can use any permanent fine tipped pen.
I also used a Micron .01 for the smaller detail.
(BUT, you could do the whole thing in pencil first, go over everything with a permanent pen and erase the pencil later- make sure it's a permanent pen so it doesn't smear when you erase your pencil lines!)
Next, trace the simple W just below the first line, flattening out the bottom points.
On the second "W" card above, I added simple lines at the top and bottom and 2 "curly Q's:)"
In the last figure above, I doodled inside the lines that I drew and added some circles and hanging hearts. Next up...L.

With the L, I did the same process.
I first drew a simple capital L.
Then, traced close to the first line, flaring out the top & bottom of the L just a little.
On the second card above I added some simple lines and swirls. (Try to let your doodles flow...there is no right or wrong in doodling!- "Don't use your 'noodle' use your heart" )
The last figure above, shows the "doodling" inside the line spaces along with the addition of a few circles, half circles and hanging heart.

Here's a close up of the "L" on the Journal Page. I used a Glaze pen to add some color.
Glaze pens are delicious
Below, is a close up of the versatile Wood Frames (used as windows here) from our August Kit.

I may add some Glossy Accents to these word cut outs so that they will "weather the storm" of my very used Mixed Media Journal.
The best way to improve your lettering is to PRACTICE!!
Here's a challenge: Use this letter doodle process on the whole alphabet and post it on our Frog Dog Facebook Page!
I would REALLY LOVE to see your work!

Ps. I know you're going to see much more Gelli Plate fun in the month ahead!!
Get ready to be inspired!! Yay!
Oh, below is a Journal Page I did using an image from the July Kit's ARTChix Ephemera Sheet using another Gelli Plate background.
Can you find her?

This is an example of my very "loose" handwriting...not fussy...far from perfect...but "real."
It's what your journaling is all about...an extension of you...your soul...open and honest:) Try and let go...just write without thinking of form...it will be you...beautiful.
Always love feedback and questions if you have any!!
Creatively Yours,
sue

OH MY WORD.. this is amazing.. i TOTALLY love it..
ReplyDeleteThank you so much! Annette, I peeked at your blog...inspiring! You are so talented:) I learn so much each time I "meet" someone new. It is such a blessing to be able to encourage one another. Thank you so much!!!
DeleteLove this page!!!!!!!!!!!!!!!!!!!
ReplyDeleteThat means a lot coming from such a talented Lady! Thank you for taking the time to read and comment Rita!!! xo
DeleteThank you for the letting lesson - I hate my writing - so never write on my layouts or mixed media. The couple times I have tried I feel like I ruined it. But you are right - I need to PRACTICE! Thanks for the encouragement!
ReplyDeleteDawn, thank you for sharing your heart about lettering! I know what you mean, and I hope that I can help change the way you feel about it!! Thank you for taking the time to comment! I look forward to more conversations with you Dawn!
DeleteBeautiful. I'll be looking forward to your column.
ReplyDeleteKateri, I hope you keep reading! What a sweet blessing to share art with each other. Your comments make my day:)
ReplyDelete