Showing posts with label collage.. Show all posts

Wednesday, April 2, 2014

Collage Painting Made Easy!!!

Good morning everyone! Melissa here, sharing my Eastern inspired collage painting using products from the April Frog Dog Studio Mixed Media kit and Amazing Clear Cast Resin from Amazing Crafting Products.

When I first received this month's goodies, I immediately fell in love with the gorgeous, vibrant tissue papers included in the kit. The bold jewel tones reminded me of the far East. Right away, designing a beautiful and colorful elephant came to mind. This painting may seem a bit complex, but in reality it was really easy to do. Especially given that the products in the kit all work so well together. It made designing the color scheme so easy. This project was actually done on the back of an old cutting board that my sweet mother in law picked up and brought to me, knowing I could turn it into something :)

To begin, I covered the back of the wooden board with white gesso. I have found that doing these collage type paintings work best on a hard surface like wood or canvas board. Then, I began to cover the piece with the tissue papers, randomly ripping and collaging them together, pressing them into the gesso and adding some matte medium over the top.


Next, I used the StayZ On ink pads from the kit to add some bold color in the empty spaces and over the top of the collage by just rubbing the ink pads directly onto the surface. I blended using a paper towel. (one of my favorite blending tools!)


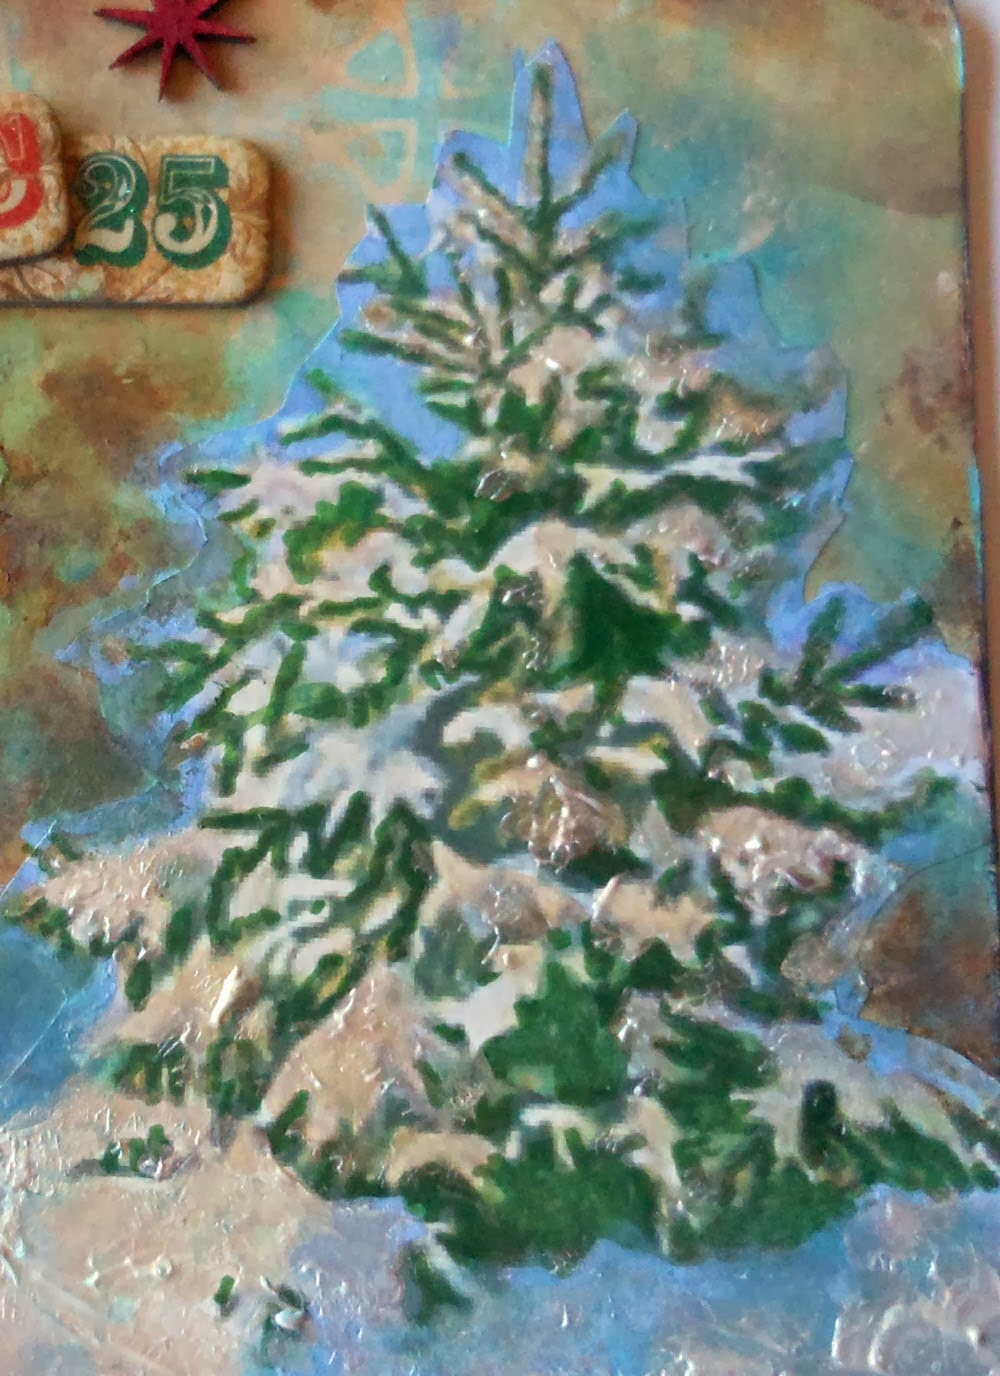
I brushed on some matte medium and dusted the painting with the mica flakes from the kit. In the second picture you can really see the shimmer it adds (not to mention the texture!)


Now for the super cool part!! I went online and found a silhouette of an elephant and printed it out. Simple shapes work best for this type of project. I cut it out and placed it directly onto the collaged background. You could attach it with a little bit of blue painters tape, but I just held mine down in place (mainly because I was too engrossed to get up and actually find the blue painters tape!)


I chose a color that seemed to coordinate well with the overall background (Teal by Golden) and starting from the elephant shape, I brushed on the paint in an outward direction all around. Once I had established the outline of the elephant, I gently (using a brush and my fingers) continued to fill in most of the background. I wanted a little bit of the red ink so show through, even adding a bit more in some places.


Next I added a bit more of the blue ink from the kit, as well as some stamping (using the new Dina Wakely stamps from Ranger) to the background. Then, I mixed my Clear Casting Resin in equal parts to seal the project and create a glassy finish. I applied the resin fairly thick, with a small palette knife.


Right after pouring and spreading, I tossed in some more of those lovely mica flakes into the resin. I love how those flakes shine through the clear resin!


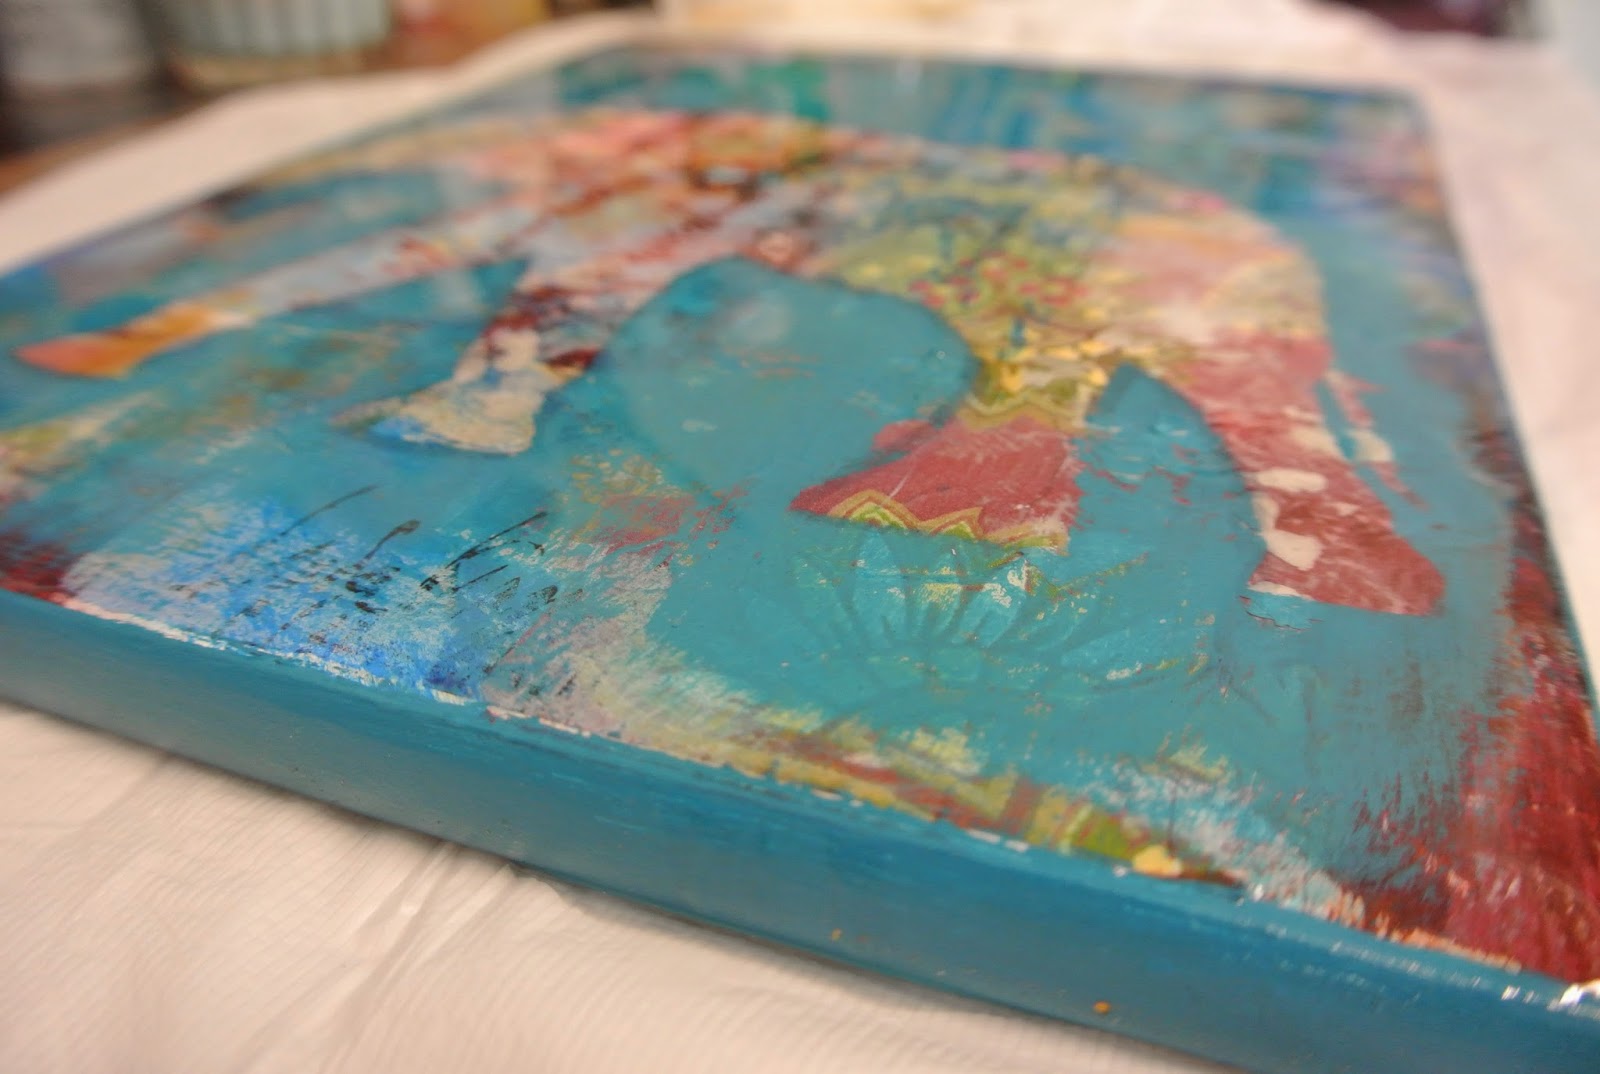
And here is the finished product. I wish pictures could convey the depth of the Clear Cast Resin and layers in the piece!

Wednesday, February 19, 2014

My Life is Mixed Media


Continuing with the feel of impressionistic artists, the February Kit is a fun way to explore color, texture, and expressing what you feel inside.  Gelatos, Pan Pastels, a button (enhanced), paint, and Amazing Mold Putty was used for this journal page.

I cut a white journal page from another white board book.  The main journal is painted with a sponge and a few blue hues tapped on to create the background.

The page itself started out with paint, sponged in various colors, overlapping.  The hues were intensified with Pan Pastels.  I love that the kit had the pink and green color!  The white Gelato was drawn through various areas in a free form way.

I made inkjet stickers of the woman and quote printed on vellum.  Adhere those with an adhesive that dries clear.

The button is enhanced with Copic Markers.  Copic Markers work well on non-porous surfaces.  The areas were a plain light tan, and I wanted to tie the colors in with the page.

The wing is molded with Amazing Mold Putty and the regular resin.  Once molded, I painted with a pearl paint.

Close up of molded wing and enhanced button.


The word Life is enhanced with the black Gelato.

I glued the page to the cover.  I can't wait to start doing more art journaling inside!!!


If you look at this art, I have used paint, pastels, Gelatos, elements, and quotes.  Mixed media is so fun to experiment with and play with how all these mediums work together.

Cre8tivelea Yours - Lea

Tuesday, December 3, 2013

The Splendor of the Holidays


Tis the Season to be Merry!!!


Once again Frog Dog Studio has come up with a killer, jam packed kit!!!  Enough product to make so many projects.  The Fabric from Tim Holtz, the modeling paste, and Silks are divine!!!  The other products are perfect for a focal point or accent.

Start out by creating your background.  Stamp, paint, Distressed Stains.......

I sketched a tree, cut it out and mounted it to the background.  I started to paint the tree, around the tree, and more on the background.  Silk paints are sheer and glisten with magic!!  You can achieve a little more opaque look by adding a thicker application of color.  But it is not totally opaque.  I used a combination of Clearsnap Colobox original pigment ink along with the Silks.  I like floating the silks on top.  The tree I painted with an olive paint but used the Silks to highlight areas and add extra glimmer.

I used an old brush to add the modeling paste as snow to the tree.  I didn't want the tree to have too much snow, so the old brush helps me control how much paste I apply.  The paste is perfect for stencils, dimension, and painting on top of!  I believe the term is Impasto, where Impressionist artists painted on dry plaster.  This can be done too, even collaging on dried paste.

 The mound of snow is deeper and more concentrated, so I used a palette knife to spread the modeling paste.  Sort of like icing, but with areas of extra texture to look like snow.

Here is a close up of the snow.  It has some smooth areas, blots of paste for texture.  Look and see how the Silks help to shade the snow in some areas.

Here is the whole tree with the snow finished and the shading/highlights.  When I first studied art, other than drawing people and cartoons, I loved realistic nature.  A tree in winter is so beautiful!


Here I have some little wood stars.  I painted the Silks on top.  I did 2 coats so it is semi-opaque, but the wood grain still shows through.  Love it!

Add the stars, and use an embellishment from one of Bo Bunny's holiday collections to finish the art.  A ribbon is added for more contrast.  

A perfect gift to give, display on an easel, add holes on top and add matching ribbon to hang on your tree or wall!

Cre8tivelea Yours - Lea