
Before we get to her first project (which you will love), let's get to know her a little better!

Hi everyone. My name is Sanna and I´m originally from Finland, but Austria has been my home due to my half Austrian half Greek husband for more than 15 years now. We have two boys who guarantee for a busy family life. My day job for a medical publisher, hobbies, our family life and many other interests keep me/us busy. I have been involved with arts and crafts & music (partly thanks to my crafty mom) since I was a little child. I´ve tried several things, but paper crafting has always been my strongest passion. As a child I loved to draw for hours and hours and my older son seems to take after his mother. I can not imagine my life without crafting. I love to create, try out new things, experiment and share my projects and ideas. I was very honored and thrilled when Tina asked me to do a GDT spot for the Frog Dog Studio. Thanks for having me here!!! Let's get to Sanna's first project! (of MANY)
Let's get to Sanna's first project!
Hi there! Sanna here again. I am very honored to be able to do a second guest spot here at the Frog Dog Studio this month and have played with the November Mixed Media kit this time. I got to play with the gorgeous art journal coloring pages designed by Catherine Scanlon. The kit included a wonderful selection of pens and other goodies as well as a set of pearlescent watercolors that I really liked to play with. The create a gorgeous shimmery effect!!

Ok,
so this is the first page I made. I first drew with the white Sakura
soufflé pen along the dots to create a resist area.

Next
I applied some water over the page and started applying a very light
opaque layer of watercolor to create the background.


After
that I took a fairly thin watercolor brush to be able to apply
watercolor on the flower petals and all the very detailed spots on the
page. This time I used less water so the effect was not that opaque.
That worked out really well with this product.


Now
I let the paper dry properly before starting to apply any details. Then
I first drew around the white swirl spots with the blue glaze pen to
create more depth around the images here and there.

After that I used the glitter pens to outline and/or color any areas that I had previously left white.

I
also wanted to add some more detail around the frame, so I first
applied some water on the paper and then applied embossing powder on
those damp areas and some Distress Glitter over that surface. I then
heated the area with a heating tool until the embossing powder melted.

I wanted to add some additional
dimension to the flowers so I first applied Glossy Accents randomly into
the middle of the flowers and then poured some yellow Glitter Glue over
the area.

Next I just used a black Sharpie for outlining the outer flower petals.

In
the end I just chose a suitable quote for the page (I love quotes!) and
applied some soufflé pen dots for additional detail around the flowers.


This is just gorgeous! Love it!
We have another amazing project from Sanna today too!


We have another amazing project from Sanna today too!

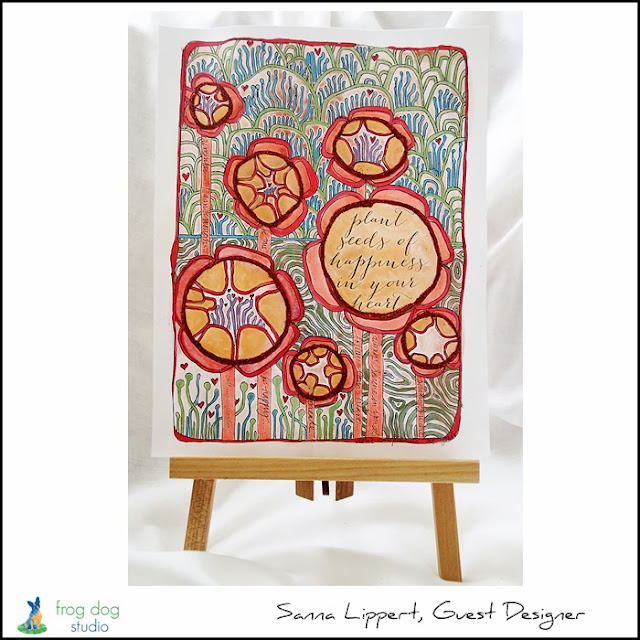
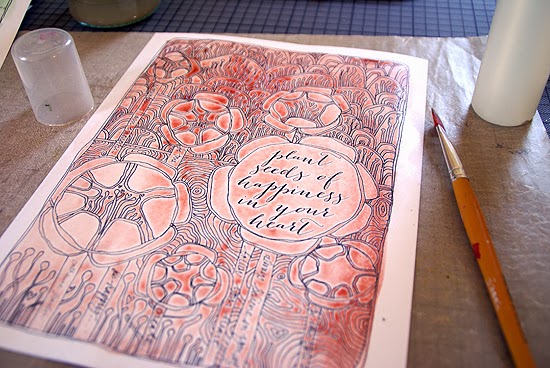
For this project I first applied water on the page and then
brushed some reddish watercolor lightly over it. After that I let it dry
properly. I really liked the fact that the areas where there was black
ink did not absorb the color and let the reddish tone "concentrate" on
free areas.

Next I took some light pink acrylic paint and applied it on the big petals with a thin paint brush.

After that I chose some markers in different tones of red and colored some petal parts with those.

After
that I just went on coloring different areas with a thin paint brush
and used different green and blue watercolor tones for that. I applied a
fairly thick layer of concentrated color on these areas and it covered
the background color completely.

When
I was finished with the coloring I again let the paper dry properly and
then applied some Glossy Accents around the center of the flowers and
covered those areas with the red Distress Glitter. I really like the
dimensional effect this creates and in addition the shine is really nice
too :).

Finally I drew some
additional hearts here and there and colored them with a red marker.


Thank you Sanna! Be sure and stop
back later in the month for another project (or two or three or four) from Sanna. We can't wait! Please
stop by Sanna's Blog and say hi!

Love your pages…great ideas for future use!
ReplyDeletethank you so much, Martha <3 !!!
DeleteLOVE how you used the white pen on the first page. :)
ReplyDeletethank you , Katie :)
Delete